I thought, seeing as it was holiday time we could do with a laugh at my expense. So I present my first wood. An unfinished story of a dad, his son, some tools and fun.
I read lots but it wasnt sinking in and I recalled someone saying you cant learn archery by only "reading" how to draw. So it was high time I applied this wisdom to bow making. I also had been given a poke with a stick, in that someone at work said, "do you want this wood its going down the tip". A bow was not the initial thought but then after getting it home and more reading I came across further words of wisdom. Something like, when starting out it doesn't need to be good wood. The batch of wood had been used for stress testing and I grabbed the leftover, unused, untested ones. They had used that multi wedge joining technique and then tested how it held up. This gave me some lengths of about 53" between joins. Not long enough for adult but about right for a kids bow.
What sort of wood..well mm they sorta said they thought it was Victorian Ash. Yep, lost most of you now as we all fear its(Tas Oak) use for bows but I was playing, learning , so it snaps who cares. I can tell you that in doing this "test run" I did pickup on some things to do next time and little jigs and measuring and shaping the wood techniques.
Testing the wood:
The first thing to try was to see how bad it was. I ripped a 40mm wide 10mm thick strip about 1.2m long and gave it a quick bend. It was obvious it was going to snap in the center if I went further so I figured it was time to glue a "handle" on to even the pressure out over the center. I let that sit over night. I guess now it resembles a flatbow.
Tilling jig:
Now I know you chaps love loverly tilling ladders and jigs but do me the justice of recalling, its my first, Im playing and I have an 8year olds 20 sec attention span to deal with. Below you will find photos of the tilling jig Jamie and I made up to test this piece of wood. A meter lump of 4x2, a fishing scale, a pulley and some blind string.
First draw:
The simple bend to floor test proved it was obvious this was not going to bend much. I had full intention of pulling this sapper down till it snapped. But some primal instinctive pressure came over me to "you cant just kill it, at least give it a chance and feather the limbs". So I will do this in an attempt to allow it to bend. Thats a story for later.
Next Step:
10# is good. But only 15", is not so good. Im aiming for a round 20-24". So what do I do now?
1) I figure I need to reduce the 40mmwidth towards the tips. Give it that bow shape. I have some rough measurements for that somewhere.
2) Reduce the overall thickness so it bends a little better.
3) I suspect because of the type of wood and its shape and its cross grain, It will need some sort of backing. Ive read about that somewhere to.
Yes it will probably break(yes im being careful) but look at all these things i learn't!!
Photos to date.
In the beginning-First wood.
Moderator: Moderators
-
stringnstik

- Posts: 1106
- Joined: Tue Oct 21, 2008 12:09 pm
- Location: Cranbourne
In the beginning-First wood.
- Attachments
-
- The tilling jig in all its glory.
- 100_2189.jpg (24.26 KiB) Viewed 3163 times
-
- At this point we were getting 10lbs with 15" draw. It really didnt want to bend.
- 100_2188.jpg (18.3 KiB) Viewed 3163 times
-
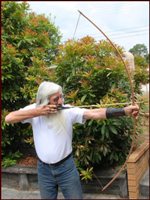
- Jamie holding the erm bow..test piece
- 100_2192.jpg (39.67 KiB) Viewed 3163 times
-
- Im pretty sure the grain is all wrong for what we want. I took a 10mm thick strip off the left hand side.
- 100_2199.jpg (19.24 KiB) Viewed 3163 times
"I am the arrow..the arrow is me...together as one...I fly to thee"
"the stick maybe crooked and the string hath no form,
then married by bowyer, transforms when first drawn"
"twang....thud"
"the stick maybe crooked and the string hath no form,
then married by bowyer, transforms when first drawn"
"twang....thud"
-
stringnstik
- Posts: 1106
- Joined: Tue Oct 21, 2008 12:09 pm
- Location: Cranbourne
Re: In the beginning-First wood.
Necked the width down to the tips and thinned out the limbs abit. Its now 10# @20" draw. Im concerned its getting to thin so I might back it first b4 I take any more off the belly. Probably use glue and that plasters tape.
"I am the arrow..the arrow is me...together as one...I fly to thee"
"the stick maybe crooked and the string hath no form,
then married by bowyer, transforms when first drawn"
"twang....thud"
"the stick maybe crooked and the string hath no form,
then married by bowyer, transforms when first drawn"
"twang....thud"

Re: In the beginning-First wood.
Hey Stringnstik
How do you think the wood would go if you followed the growth rings next time.
Use one of them to run the length of the bows back.
If I were you I would finish the bow to look like it works and fancy it up to look like a native american bow with some paint, feathers and leather and hang it on the wall as an ornament. Who cares if id doesn.t shoot. It always looks good having a bow on the wall and at least if somebody tried to use it nobody will get hurt.
Your next one will for sure. The more you try the better you will be.
Is it fun. That;s all that matters. especially with your boy to help.
Tex

Re: In the beginning-First wood.
It is difficult to evaluate the situation from the photos.
The length of the bow should be somewhere between shoulder and ear hight of the archer.
Any longer and the bow will not perform at their draw length. If the limbs are not taken to near stress limit they will not perform.
Instead of using plasterers tape can you cut a thin lamination from the timber that you have?
You could try shortening the grip area on the handle which will give a more gentle fade into the limb. This could help reduce the possibilty of a hinge.
Enjoy the adventure.
Daryl.
"And you must not stick for a groat or twelvepence more than another man would give, if it be a good bow.
For a good bow twice paid for, is better than an ill bow once broken. [Ascham]
“If a cluttered desk is a sign of a cluttered mind, of what, then, is an empty desk a sign?” [Einstein]
I am old enough to make my own decisions....Just not young enough to remember what I decided!....
For a good bow twice paid for, is better than an ill bow once broken. [Ascham]
“If a cluttered desk is a sign of a cluttered mind, of what, then, is an empty desk a sign?” [Einstein]
I am old enough to make my own decisions....Just not young enough to remember what I decided!....
-
stringnstik
- Posts: 1106
- Joined: Tue Oct 21, 2008 12:09 pm
- Location: Cranbourne
Re: In the beginning-First wood.
Thanks guys for the help.
I did notice last night that its stiff around the handle area so taking some wood off there will help.
Ok on laminating rather than plasters tape, that tape finish does look awful.
"The length of the bow should be somewhere between shoulder and ear hight of the archer.
Any longer and the bow will not perform at their draw length. If the limbs are not taken to near stress limit they will not perform."
wise words greybeard I think I used double reach plus a half technique Ill check it tonight with your method and dble check the stick length.
to be honest Im amazed it resembles a bow and I just love working with wood. Ive built some cabinets and stuff in my time but thats all cutn square stuff. This shaping gig is far more fun.
Tex ok on the using the grain properly, it was really "this is going to break" quick test which has grown beyond The problem came when I realised it was unfair to stress the stick without support in its center. Once id glued a handle on it resembled a bow too much to just break it
I may cut another strip and break it without a center support, just so I know.
I am having difficulty scraping the belly. Tried a rasp, then a block plane(pulling towards me) and on the other limb I used a belt sander upside down. I need to work on my carving techniques. As none of the above gave a consistent flat surface. I did find a quick tiller trick (only workable with such low poundage bows I suspect) was to brace the handle on my stomach, grabbing both tips with each hand respectively and try to wrap the bow around me. I found I could get a good feel for what was going on in the limbs, a few wipes down the linicher, then belly till again. I suspect this will only work while Im roughing it out. Ill go back to the tiller when I get closer.
""If the limbs are not taken to near stress limit they will not perform.""
Aint that a grand comment A bit like my brother in laws mechanical saying. "How tight do I do the nut up"....."until it breaks then back it off half a turn":)
I understand tho. For this one Ill simply keep thinning the belly in an even curve until I get my 10-15# at 24" Unless it breaks b4 that.
I did notice last night that its stiff around the handle area so taking some wood off there will help.
Ok on laminating rather than plasters tape, that tape finish does look awful.
"The length of the bow should be somewhere between shoulder and ear hight of the archer.
Any longer and the bow will not perform at their draw length. If the limbs are not taken to near stress limit they will not perform."
wise words greybeard I think I used double reach plus a half technique Ill check it tonight with your method and dble check the stick length.
to be honest Im amazed it resembles a bow and I just love working with wood. Ive built some cabinets and stuff in my time but thats all cutn square stuff. This shaping gig is far more fun.
Tex ok on the using the grain properly, it was really "this is going to break" quick test which has grown beyond
I may cut another strip and break it without a center support, just so I know.
I am having difficulty scraping the belly. Tried a rasp, then a block plane(pulling towards me) and on the other limb I used a belt sander upside down. I need to work on my carving techniques. As none of the above gave a consistent flat surface. I did find a quick tiller trick (only workable with such low poundage bows I suspect) was to brace the handle on my stomach, grabbing both tips with each hand respectively and try to wrap the bow around me. I found I could get a good feel for what was going on in the limbs, a few wipes down the linicher, then belly till again. I suspect this will only work while Im roughing it out. Ill go back to the tiller when I get closer.
""If the limbs are not taken to near stress limit they will not perform.""
Aint that a grand comment
I understand tho. For this one Ill simply keep thinning the belly in an even curve until I get my 10-15# at 24" Unless it breaks b4 that.
"I am the arrow..the arrow is me...together as one...I fly to thee"
"the stick maybe crooked and the string hath no form,
then married by bowyer, transforms when first drawn"
"twang....thud"
"the stick maybe crooked and the string hath no form,
then married by bowyer, transforms when first drawn"
"twang....thud"
-
stringnstik
- Posts: 1106
- Joined: Tue Oct 21, 2008 12:09 pm
- Location: Cranbourne
Re: In the beginning-First wood.
Srapers are awesome!!
these things,
http://www.carbatec.com.au/scraping/ver ... d-scrapers
Went down to the local woodwork shop to get some titebond 3 glue and had a chat with the shopkeeper He recommended I try these. Got em home and both me and the boy were scraping away, nice n smooth, no chattering, no nasty rasp scratches or billows of sawdust and no gouges, what a great tool.
My local bunnings dont sell veneer anymore, pretty unhappy about that, will try elsewhere this w/e. kinda slowed the project up a little tho as I dont want to take more off till i have backed it.
"I am the arrow..the arrow is me...together as one...I fly to thee"
"the stick maybe crooked and the string hath no form,
then married by bowyer, transforms when first drawn"
"twang....thud"
"the stick maybe crooked and the string hath no form,
then married by bowyer, transforms when first drawn"
"twang....thud"
Re: In the beginning-First wood.
Usually, I use the double the draw length plus 20% rule. I believe that this is a reasonable starting point but should not be taken as the difinative measure.
Bows made from milled boards require a different approach to those made from split bush billets.
The most useful tools [for me] when making selfbows is a correctly set, sharp spokeshave and the rubber backed sanding tool used by plasterer's to smooth the joins.
When tillering the bow work from the tips to the handle.
Cheers,
Daryl.
"And you must not stick for a groat or twelvepence more than another man would give, if it be a good bow.
For a good bow twice paid for, is better than an ill bow once broken. [Ascham]
“If a cluttered desk is a sign of a cluttered mind, of what, then, is an empty desk a sign?” [Einstein]
I am old enough to make my own decisions....Just not young enough to remember what I decided!....
For a good bow twice paid for, is better than an ill bow once broken. [Ascham]
“If a cluttered desk is a sign of a cluttered mind, of what, then, is an empty desk a sign?” [Einstein]
I am old enough to make my own decisions....Just not young enough to remember what I decided!....
-
stringnstik
- Posts: 1106
- Joined: Tue Oct 21, 2008 12:09 pm
- Location: Cranbourne
Re: In the beginning-First wood.
Thanks Daryl,
I did get a spokesshave last night. They are a neat tool too. I just didnt have it setup right and it was more a case of getting Jamie involved than real tillering. I had him scraping nicely with the scrapers in only a few minutes.
"...from tip to handle"..Of course I have been doing it the other way Will change that. thanks for the tip.
I glued the bow nocks on last night and in so doing have shortened the entire bow by ~2.5". Its only just past his ear now. I also used my loose tiller string and a nocked arrow, properly anchored at full draw, to get the proper draw length. Marked the arrow at the bows back and he is 20". You know all that stuff I should have done first
I did get a spokesshave last night. They are a neat tool too. I just didnt have it setup right and it was more a case of getting Jamie involved than real tillering. I had him scraping nicely with the scrapers in only a few minutes.
"...from tip to handle"..Of course I have been doing it the other way
I glued the bow nocks on last night and in so doing have shortened the entire bow by ~2.5". Its only just past his ear now. I also used my loose tiller string and a nocked arrow, properly anchored at full draw, to get the proper draw length. Marked the arrow at the bows back and he is 20". You know all that stuff I should have done first
"I am the arrow..the arrow is me...together as one...I fly to thee"
"the stick maybe crooked and the string hath no form,
then married by bowyer, transforms when first drawn"
"twang....thud"
"the stick maybe crooked and the string hath no form,
then married by bowyer, transforms when first drawn"
"twang....thud"
-
stringnstik
- Posts: 1106
- Joined: Tue Oct 21, 2008 12:09 pm
- Location: Cranbourne
Re: In the beginning-First wood.
It is only fair to post good and bad. The "lil wolf" as we have come to call it is, well was finished last night. But on re stringing this morning it was evident it had changed over night,, I guess thats what you get for using incorrect wood.
However the experience was well worth it. I ended up with a number of jigs and thoughts on how to do it better next time. Jamie and I have both had fun making and shooting the "lil wolf', including the arrows.
specs:
Type flatbow.
wood: Victorian ash with vic ash handle. Grain at 90deg to limb (limbs ~7mm thick)
48" nock to nock.
15# @ 20" draw
string follow: lower limb 1 1/2", upper limb 1 3/4"
brace:5 1/2"
backing: carbon fiber
finish: clear varnish on back 4 coats. Decking oil on belly.
string: blind string with nylon/cotton servings.
notes: hinge on bottom limb. appeared over night:( I wonder if the decking oil did it?Maybe I didnt exercise it enough, whilst tillering? Strange thing was that the upper limb had been "in trouble" all along and was constantly giving us strife. Im lost as to how it suddenly swapped. At no stage did a hinge like this appear on either limb during tillering. My only other thought was that i was using the bow braced for some hours last night whilst I was serving the string.
Carbon fiber was used to back the bow, one because I had it and two because there was concern of limb breakage.The carbon matting would at least stop a splintering, catastrophic breakage.
No signs of the 3 c's, cracking, creaking or creeping.
If nothing else it will good on his wall!
However the experience was well worth it. I ended up with a number of jigs and thoughts on how to do it better next time. Jamie and I have both had fun making and shooting the "lil wolf', including the arrows.
specs:
Type flatbow.
wood: Victorian ash with vic ash handle. Grain at 90deg to limb
48" nock to nock.
15# @ 20" draw
string follow: lower limb 1 1/2", upper limb 1 3/4"
brace:5 1/2"
backing: carbon fiber
finish: clear varnish on back 4 coats. Decking oil on belly.
string: blind string with nylon/cotton servings.
notes: hinge on bottom limb. appeared over night:( I wonder if the decking oil did it?Maybe I didnt exercise it enough, whilst tillering? Strange thing was that the upper limb had been "in trouble" all along and was constantly giving us strife. Im lost as to how it suddenly swapped. At no stage did a hinge like this appear on either limb during tillering. My only other thought was that i was using the bow braced for some hours last night whilst I was serving the string.
Carbon fiber was used to back the bow, one because I had it and two because there was concern of limb breakage.The carbon matting would at least stop a splintering, catastrophic breakage.
No signs of the 3 c's, cracking, creaking or creeping.
If nothing else it will good on his wall!
- Attachments
-
- Another bad phot. Jamiw wanted special nocks so i used the nock shape and carved/pokered a lizard on.
- 100_2242.jpg (54.2 KiB) Viewed 2881 times
-
- Not a great photo of the limb tattoos.
- 100_2241.jpg (8.78 KiB) Viewed 2880 times
-
- A bows not a bow till it has tats! according to Jamie. So poker work was in order.
- 100_2236.jpg (10.74 KiB) Viewed 2880 times
-
- waiting for the backing to glue.
- 100_2224.jpg (20.36 KiB) Viewed 2880 times
-
- Lapping up the carbon fiber backing
- 100_2211.jpg (14.98 KiB) Viewed 2882 times
-
- Its a family project ;)
- 100_2200.jpg (22.35 KiB) Viewed 2879 times
-
- scraping the belly
- 100_2204.jpg (21.11 KiB) Viewed 2879 times
-
- you can really see the hinge on the bottom limb ..where did that come from?
- 100_2239.jpg (14.79 KiB) Viewed 2880 times
"I am the arrow..the arrow is me...together as one...I fly to thee"
"the stick maybe crooked and the string hath no form,
then married by bowyer, transforms when first drawn"
"twang....thud"
"the stick maybe crooked and the string hath no form,
then married by bowyer, transforms when first drawn"
"twang....thud"