- IMG_1306.jpg (54.4 KiB) Viewed 7611 times
- IMG_1305.jpg (71.37 KiB) Viewed 7611 times
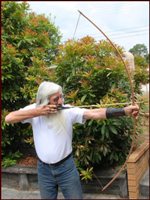
Well, I hope this turns out to be a documented process of the oft-mentioned but not-so-oft demonstrated project of building a working, full size bow from a spliced pair of hardwood pickhandles. As with my last (first) bow however, I hope to benefit from the advice and experience of you all on this excellent forum.
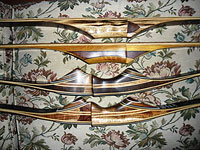
Pictured are my purchases from bunnings today. As mentioned, the handles are hickory, and they are 35" long by 1 1/2" wide. The growth rings are a pretty decent match i think, and with a fair new/old growth ratio. I'm not going to attempt to chase down to one growth ring or anything fancy like that though- this baby is going to be backed, probably with rawhide like#1.
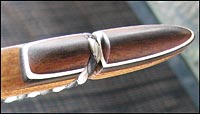
At this point I can see myself trying a lap (tongue/groove) splice, as I'll be cutting it with a handsaw and this seems the best compromise between creating a big gluing surface area and a realistic goal using handtools. If I make the spliced area 4"long, this will result in a stave 66" long, with a maximum ntn measurement of about 65".
I'm thinking a flatbow with parallel limbs that taper over the last 12" or so of each limb down to the nocks may be the design to start with in mind, and ideally I'd like to achieve a draw weight of 45-50lb @28".
MY QUESTIONS:
-Does the length and width of the timber at hand seem to be enough wood to create a bow of the above mentioned weight/drawlength?
-If so, would the design need to be bending (the tiniest bit) through the handle, and is this even something one should consider with a spliced stave?
-If the spliced area should be rigid, what do you guys estimate may be the most weight I could aim for @28" from the above mentioned
stave?
I know I ask a lot, but if we could make a success of this buildalong I think it would be the only one on the internet, and a really valuable resource for people (like myself) who are yearning to experience bowmaking but are struggling even to source suitable floorboards let alone staves to get started.
Thanks in advance,
Darren