Well I finally got around to making a longbow after watching this forum for nearly 2 years.
The bow has 3 vertical bamboo tapers and one kwila taper, 16" kwila riser and Bearpaw clear glass. It was cooked with Binghams heat strips for 2 hours @ 65C and 65 psi hose pressures. The blank looked fine out of the mould and I left it overnight before shaping limbs. After sizing the limbs it pulled 52#@28" with 3/16" tiller.

- Bow#1 in the form.jpg (132.58 KiB) Viewed 3596 times
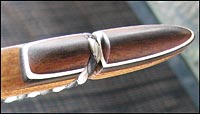
Next I put on the tip and riser overlays and cooked them by placing floodlamps next to the glued components. Be careful doing this, when I went to check on the thing after about an hour I noticed the riser section was very hot. After measurement with an infrared thermal gun it was nearly 95C and I went OH NO, I have stuffed my first bow. But it seems to have held together OK.

- Bow #1 Tip Overlay.jpg (97.77 KiB) Viewed 3596 times

- Bow #1 Riser Overlay.jpg (137.66 KiB) Viewed 3596 times
Next I set about shaping the shelf and handle. This is fun and didnt take too long to rough it down with a 7" sander/polisher and 60 grit disc. A bit for shaping with a half round rasp and bastard file and it looks like it could be a good thing after finishing with finer sandpaper.
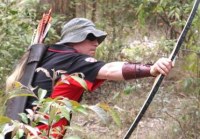
Time to put a new string on and have another measure and weigh. OH NO AGAIN - somewhere along the way I got it upside down and the positive tiller became negative 1/8" (despite various markings on the bottom limb

). I think I will have to buy carton for that mistake, luckily there is only me and me to drink it, unless some locals would like to have a beer with me and point and laugh

. Weight reduced to 50#@28" so I was at least happy with that. I reckon get it to full draw on the tiller tree and see how it looks. At full draw the difference reduced to around 1/16" negative tiller (measuring from the string line to the end of the level in the pic below).

- Bow #1 On the tiller tree.jpg (152.69 KiB) Viewed 3596 times
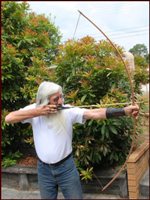
Is it safe and what is the most suitable method to get the tiller back to neutral or a bit positive? It has a bit of hand shock and makes a twang but that could be just the 12 strand fast flight string with no padding. Next I will make a padded loop string and install some silencers. The bow still needs fine sanding and some sort of finish but I wanted to hear some thoughts on the tiller process.
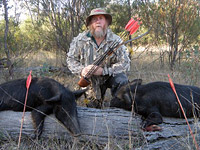
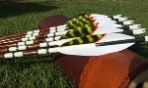
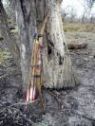
The last pic shows a bit of leather work I made to go with the bow over the Christmas break.

- Bow #1 with accesories.jpg (164.25 KiB) Viewed 3596 times
Cheers......... Rod