thought Yall might like this, My osage adventure. Updated 13

How to make a Bow, a String or a Set of Arrows. Making equipment & tools for use in Traditional Archery and Bowhunting.

Moderator: Moderators

Message
Author
KellyG
Posts: 194
Joined: Tue Nov 09, 2010 5:53 am
Location: Riley, Kansas, USA

thought Yall might like this, My osage adventure. Updated 13

#1 Post by KellyG » Wed Jan 12, 2011 5:43 am

NOTE: IF YOU HAVE NEVER DONE THIS AND STUMBLED ON TO MY THREAD; PLEASE READ IT ALL JUST DON'T LOOK AT AND READ MY PARTS. I HAVE NEVER DONE THIS EITHER DONE THIS EITHER AND MAY HAVE SCREWED SOMETHING UP. MORE KNOWLEDGEABLE MAY HAVE CORRECTED WHAT I HAVE SAID AND TOLD ME HOW TO DO IT BETTER. DON'T KNOW MYSELF I AM NOT DONE AT THIS TIME; SO FAR SO GOOD.

If you have done this and you look thru it and see that I am really wrong Please let me know so I don't led other wrong.


I was sent an Osage stave for the states. Long story short they seen me working on that cedar and sent this to me. This first pic is of the end and showing my planned split. I was advised to take the sap wood off first before splitting. More on that later. You see the can see the ring I want to chase here also it is the big fat one under all those pesky little ones.
Image
since I have never done this I tested out an end
Image
work area, I went with two straps.
Image
From my point of view
Image
Most of it done (sap wood removal that is) you can see what is left of the attached letter with it.
Image
Last edited by KellyG on Mon Feb 14, 2011 5:40 am, edited 11 times in total.

KellyG
Posts: 194
Joined: Tue Nov 09, 2010 5:53 am
Location: Riley, Kansas, USA

Re: thought Yall might like this, My osage adventure.

#2 Post by KellyG » Wed Jan 12, 2011 5:44 am

Last little bit of sap wood
Image
Pin knot, and more pin knots, I used a marker to mark them so I could try and avoid them it helped.
Image
Image

KellyG
Posts: 194
Joined: Tue Nov 09, 2010 5:53 am
Location: Riley, Kansas, USA

Re: thought Yall might like this, My osage adventure.

#3 Post by KellyG » Wed Jan 12, 2011 5:45 am

Ok today I split it. I started with a Sawzall and stopped. One it was not easy or quick and two I really was not enjoying the wood. I love the saw dust; all bright yellow. It did not feel right. I went and 2 camp axes and an old axe head. Could not find the hand sledge but my bigger camp exe would have to do.

this is where I started my sawzall. I did not got deep but scored the back about 18" from the end before stopping.
Image
I did take the camp axe and the lager one and tested the first know and pounded it. It started to spilt toward the next I stopped and wend to the next before the crack reached it and could run around it. Then pounded into it until it started to crack towards the third and moved to it. After It started to split, I used the axes to connect the cracks I started with the ones on each end.
This image show one of the knots and my split.
Image
Once I was satisfied I would be able to walk the cracks I started with two wedges in the center as PatB suggested. (I would have started at one end but I am trainable)
Starting in the center.
Image
Starting to open up.
Image
Here the splinter that don't want to split. I put the axe/wedge on them they can decide to run into the log so I just cut them in half before they get a chance.
Image
oops what is this now we have two.
Image
Happy camper
Image
Now here is my delima, do I play with the one on the left only two of the small knots in one limb but high crown on the rings, or the one on the right with a flater ring but 7 knots down its back.
I hope most of the knots are removed with the upper rings but I don't know. The knots will slow me down a little.
This Pic was before the split but after the sawzall it shows the rings though.
Image
Hope you enjoy, and what do yall think,
More to come as you can see
Not done yet,
Kelly

User avatar
Benny Nganabbarru
Posts: 1775
Joined: Thu May 24, 2007 5:14 pm
Location: Katherine, NT

Re: thought Yall might like this, My osage adventure.

#4 Post by Benny Nganabbarru » Wed Jan 12, 2011 7:22 am

Good on you, Kelly; you're a talented fellow. Will your boss let you carry that around when finished instead of your rifle? Have fun! Cheers, Ben
It's the great, big, broad land 'way up yonder,
It's the forests where silence has lease;
It's the beauty that thrills me with wonder,
It's the stillness that fills me with peace.

User avatar
rmcpb
Posts: 127
Joined: Tue Oct 19, 2010 6:11 pm
Location: Blue Mountains, NSW

Re: thought Yall might like this, My osage adventure.

#5 Post by rmcpb » Wed Jan 12, 2011 7:40 am

Really good to see a bow from the VERY beginning. Will watch this thread with interest.
Cheers
Rob Browne

Its OK to make a mistake,
Just try not to make the same one twice.........

User avatar
Stickbow Hunter
Supporter
Supporter
Posts: 11637
Joined: Sat Jul 26, 2003 8:33 pm
Location: Maryborough Queensland

Re: thought Yall might like this, My osage adventure.

#6 Post by Stickbow Hunter » Wed Jan 12, 2011 9:57 am

Great to see Kelly and I too will enjoy watching your progress. Thanks for sharing it with us.

Jeff

User avatar
AndyD
Posts: 214
Joined: Fri Sep 18, 2009 9:38 pm

Re: thought Yall might like this, My osage adventure.

#7 Post by AndyD » Wed Jan 12, 2011 6:49 pm

This will be interesting to watch unfold.

Never seen the process from start like this.
Common sense; so rare it should be considered a superpower.

KellyG
Posts: 194
Joined: Tue Nov 09, 2010 5:53 am
Location: Riley, Kansas, USA

Re: thought Yall might like this, My osage adventure.

#8 Post by KellyG » Wed Jan 12, 2011 8:37 pm

Don't feel bad I have read about it, but I have never seen the whole process like this. It is always fun to watch the fights but now I am in the ring (gulp). I have this posted on another forum also, it has the fellows on it that were involved in getting me the stave. They are some very knowledgeable folks there, and Osage is one of their favorites to work with.

Welcome and regardless of the end result I will bring you along, I think if I hit a snag it is important for all to learn and not just me.

Kelly

KellyG
Posts: 194
Joined: Tue Nov 09, 2010 5:53 am
Location: Riley, Kansas, USA

Re: thought Yall might like this, My osage adventure. Update

#9 Post by KellyG » Thu Jan 13, 2011 6:43 am

Ok got the twin sealed.
Image
Now for knots.
Prep and tools (who needs a vise)
Image
I am doing this know before I find out I am wrong. If I am right then I will hog off some wood to get to my ring and you learn something. If I am wrong the mentors here slap me around a little and then tell me how to fix it know and you learn something.

The first pic is of the knot in question you see another off to the left I am not worried it is on the side and I just one to focus on one. The two knots form a saddle and that poses a problem itself. You can also see a few layer of rings or grain. We ain't making pretty cabinets or furniture so want will make that pretty grain go bye, bye. I hope this is how.
Image
I went to the left (I am left handed it was easiest) then the right. The layer of ring will make a foot ball shape and you just move closer and closer with the tip of a knife, scraper or corner of the draw knife (tried them all). One layer at a time. As you can see in front heading toward the next knot the splinter pile up. I come from the other knots back and they go bye, bye. This way I don't muscle thru the knot. (what is that you thought I was not worried about that knot, for it was on the edge. Please hold questions til the end.)
Image
Ok the next two are of removing the side leaving the knot and the next ring, never go over the top always from the side. (don't ask how I know, told you to hold your questions)
Image
Image
Now the next on just show the knot with a few more rings to go. you can see them in the top of the Pic. (the 3 whitish lines)
Now I am down to the ring I wanted to be at for this test run.
Image
See no whitish lines. If you could see it from the side that little guy stands up about a mm.
Ok now for something I think is going on. I have read about and be told about the chattering of the bladed going from early growth to late growth. I think I know what causes it. Imagine your blade is a car going on a nice smooth new road. you look off the side and see a monster game animal that gets your blood a pumping. Next thing you know that verum verum sound of the shoulder things designed to scare the living tar out of ya, bring you back from chasing that game animal, to the task of driving the car and getting off the shoulder. Well the noise is caused by vibrations of the tire on them things.
Late wood smooth, early wood not thus chattering.
OK now for the question and advice on my attempts.
Please be honest and I know there is more than one way to skin the cat. So please let me know what works for you so I and other may learn.
thanks,
Kelly

KellyG
Posts: 194
Joined: Tue Nov 09, 2010 5:53 am
Location: Riley, Kansas, USA

Re: thought Yall might like this, My osage adventure.

#10 Post by KellyG » Fri Jan 14, 2011 10:21 am

Ok so I thought I would get a little done. I am still working on getting down to one ring (a test ring if you will) I am working on getting comfortable with the draw knife. I did a lot of work tonight with just it. I have about 20" to go and I will be down to one ring across the whole back. I am not using it as the back of the bow for 3 reasons. 1) I know I have violated the ring somewhere to many pin knots for me to not have. 2) The cracks in it thus far; they are a lot small than when I started and I will remove a lot more wood (around an inch). 3) I want that first fat one really bad, don't know why but that is what I want.
Here it is almost to one ring.
Image
Tomorrow night I will get that last 20".
How's it look so far?
Thanks Kelly

User avatar
Stickbow Hunter
Supporter
Supporter
Posts: 11637
Joined: Sat Jul 26, 2003 8:33 pm
Location: Maryborough Queensland

Re: thought Yall might like this, My osage adventure. Updated 14

#11 Post by Stickbow Hunter » Fri Jan 14, 2011 10:36 am

Lookin' good so far mate. It looks like it will have a bit of character about it to. :D

Jeff

KellyG
Posts: 194
Joined: Tue Nov 09, 2010 5:53 am
Location: Riley, Kansas, USA

Re: thought Yall might like this, My osage adventure. Updated 14

#12 Post by KellyG » Sat Jan 15, 2011 1:02 pm

Thanks
Jeff it migh have a little, it is more of a twist.

Ok got one ring here it is my test just to see what I can do. Did it all with draw knife.
Image
Now I have started to get down to the ring above the one I wanted. You can also see a pin knot that I have left a buildup of wood around.
Image
I only got about a third of the way down the stave on this ring. I will finish up tomorrow. getting to the ring. now to bring it down to the last ring I put up the drawknife and scrap or sand down to the my ring; correct?
I also put more super glue in it. I am truly worried about the very dry humidity even with the recent rains it seem the crack grow every day. The one I pained the back on seems good but I left it out side for 2 days and just brought it in. I may have to look into a humidifier. The shower as suggest would be good but I am afraid it would not be there when I returned to get it.
I have been thinking about the design and I think I am going for the same nn as my long bow so I can use it's string. Long and sleek narrow limbs and 45-50# @27".
They are cutting down some old eucalyptus and some have this reddish brown or burgundy color I am think about getting a small pieces for overlays. If I cut some and split it I will lay it with the Osage to see how it looks with it.
thanks for looking,
Kelly

KellyG
Posts: 194
Joined: Tue Nov 09, 2010 5:53 am
Location: Riley, Kansas, USA

Re: thought Yall might like this, My osage adventure. Updated 14

#13 Post by KellyG » Sat Jan 15, 2011 1:46 pm

Ok got up to go run 8 or so miles and it is rain, I ain't sugar or the other stuff, but I still dont like running in the rain. So I snapped a PIC of the super glue in the crack. It is something that was suggested and I started doing. this is in the ring above the one I want..
Image

This is my first time ever trying to chase a ring so if you see something wrong let me know.
Thanks for looking,
Kelly


Ben K,
I don't since we are no longer a "combat force but an Assist and Advise" (some body for got to get that memo over to the insurgents) so our running around over here is coming to and end, trying to let thier Police and military clean up what is left.
I read somewhere once that in WWII there was a unit of US soldiers who was trained and used only bows. They did silent raids. Don't really know much about them other than they existed.
Again thanks for looking,
Kelly

KellyG
Posts: 194
Joined: Tue Nov 09, 2010 5:53 am
Location: Riley, Kansas, USA

Re: thought Yall might like this, My osage adventure. Updated 14

#14 Post by KellyG » Sat Jan 15, 2011 3:47 pm

Ok just to make sure I am using the draw knife right. Here is the wood before I use the knife. I will start at the ratchet strap and on the right side . Pull the knife towards me with the bevel up ( the shiny edge). Also take not of the ring edges there is a small pin knit it that but way too much wood around it we will look at that in just a second.
Image
See the little curl I hope that is what I want.
Image
Since I was just starting on that ring of late growth it is a small shaving. But here it is beside one I took off last night once you get thru the late stuff and can get a bite under it.
Image
Same big splinter with back (of bow if it stayed on) all late wood.
Image
and now the belly of the same splinter with early growth clinging on.
Image
Now for bevel down. I am pushing towards a knot just hard enough to lift the edge of the grain, I will do will move the knife left or right to lift up the whole edge as needed. Then just brake them off by lifting the knife up, it brakes at the upper ring. I then I move to the one above it, and walk up the to the top. I DO NOT DO THE TOP MOST RING. You will just cut the knot right off before you know it. Dont ask how I know just trust me. You have to get out a smaller bald and scarp around the knot.
Here is the PIC of the bevel down going in to a edge of the ring. I did have to back out once started and move just left or right to get the whole edge. The splitters should only be an inch or so I am just trying to get rid of the island of wood I left around the knot .
Image
It takes longer to explain and show than it really takes.
Thanks Kelly

User avatar
Stickbow Hunter
Supporter
Supporter
Posts: 11637
Joined: Sat Jul 26, 2003 8:33 pm
Location: Maryborough Queensland

Re: thought Yall might like this, My osage adventure. Updated 15

#15 Post by Stickbow Hunter » Sat Jan 15, 2011 4:15 pm

Great to see your progress Kelly. Seeing you doing it with the draw knife makes me feel kinda guilty as I use an angle grinder with very a course grit sanding disc to remove the excess wood and then a scraper as I reach the ring I want. :D

Jeff

KellyG
Posts: 194
Joined: Tue Nov 09, 2010 5:53 am
Location: Riley, Kansas, USA

Re: thought Yall might like this, My osage adventure. Updated 15

#16 Post by KellyG » Mon Jan 17, 2011 6:55 am

Ok before lunch I had a couple of hours I scraped the last two ring off the ring I am chasing. Where I thought I screwed up I did but I only exposed the ring I wanted. Once I had chased it down to the part where I picked up two ring with the draw knife and cut them off about a 4-5" long piece and about 1/2 wide at its widest.
I thought I had somehow just got thru my ring and was going to have to go to the next.

I started scraping and got to the point and it was my ring not a make on it at that point.

Well once I get the rest of these two rings off I will get some PIC up for you to see.

tool report

Spoke shave blade good scraper for small areas, Size makes it hard to see the blade.

Draw knife will work as a scraper, I tried on area I was sure I was planning on cutting off. I think it may be a little more likely to take too much off if you get relaxed and drop your angel.

Hunting knife rounded blade near the point good for getting in small depressions and between saddles of close Pin knots.

Multi tool/pocket knife without a serrated blade,
Good for going around and over knots scraping or small tight areas.

Scissors well that is the best thing next to sliced bread. You put on some leather gloves and scrap, scrap and scrap a way. The longer blade can be flimsy if you are haveing to do fine work, but it really get the shaving pileing up. Get you a pair that have a screw and take it out now you have two.

Use all the above at about 90 degrees to the wood you are wishing to scrap.
Kelly

KellyG
Posts: 194
Joined: Tue Nov 09, 2010 5:53 am
Location: Riley, Kansas, USA

Re: thought Yall might like this, My osage adventure. Updated 15

#17 Post by KellyG » Mon Jan 17, 2011 6:56 am

Ok I got it down to one ring. Here are some pics of me scraping using half a scissors.
Here I am pushing way from me and to the newly exposed ring I am chasing.
Image
Here I am pulling toward me and away from the newly exposed ring. I like pushing away better this tends to make a sharp change from one ring to the next.
Image
Here is the smooth transition I got by pushing the scrapper away from me. Two ring on the right are going bye bye. At the left edge that is just little around a knot.
Image
Ok this next Pic is of me working on the out most ring but not the one above the one I am chasing. I add a little more pressure to get the wood coming off.
Image
Now I am working on the edge of the ring that is just above the one I am chasing. I use shorter strokes and less pressure. Notice the difference.
Image
I did super glue the checks they are smaller, but not gone. After the glue dries on my gizmo I will make the center of the bow and work on a design or layout.
I want the length and weight to be the same as my viper so I can use it's string and arrows.
We shall see.
thanks,
Kelly

KellyG
Posts: 194
Joined: Tue Nov 09, 2010 5:53 am
Location: Riley, Kansas, USA

Re: thought Yall might like this, My osage adventure. Updated 16

#18 Post by KellyG » Thu Jan 20, 2011 8:00 pm

So here is where I am.
This is the narrow limb at 3/4" Draw knife maybe half an hour.
Image
This is the wide limb at 3/4" Draw knife and over an hour maybe 2. It did not want to give up any wood. That and the twisted limb at the end.
Image
Now a close up of the wide end and the twist. This pic does not show it but the last 6" or so almost got 90degrees.
Image
I am done for tonight. Now that I have also gotten ride of the troublesome knot that was sticking out the side of the belly I can start laying out. That is tomorrow check list, find center of bow length wise. Then decide what is excess length, and find center of future handle and make it. Then lay out limbs and trim the fat. She might even bend then.
Thanks, God bless and Happy building,
Kelly

User avatar
Stickbow Hunter
Supporter
Supporter
Posts: 11637
Joined: Sat Jul 26, 2003 8:33 pm
Location: Maryborough Queensland

Re: thought Yall might like this, My osage adventure. Updated 16

#19 Post by Stickbow Hunter » Thu Jan 20, 2011 8:07 pm

Thanks for the update Kelly! :D

Jeff

KellyG
Posts: 194
Joined: Tue Nov 09, 2010 5:53 am
Location: Riley, Kansas, USA

Re: thought Yall might like this, My osage adventure. Updated 20

#20 Post by KellyG » Thu Jan 20, 2011 10:30 pm

Welcome,
I was out of my area for a day or so did that last night when I got back.
Kelly

KellyG
Posts: 194
Joined: Tue Nov 09, 2010 5:53 am
Location: Riley, Kansas, USA

Re: thought Yall might like this, My osage adventure. Updated 20

#21 Post by KellyG » Sat Jan 22, 2011 4:56 am

Today I marked my center with the modified gizmo. Ran into two snags.
1 the modified gizmo is too long in one section to follow the contour of the limb. I have a shorter one in my office so tomorrow I will use it on the wavier limb.
2 a knot on the edge of the limb . Should I just leave it full with there? must admit I am scratching my head on this one. Is before mid limb. each
Each limb is 32.5" long from the handle I have not marked fades yet. I am shoot for 69" ttt and 68 ntn and was planning on going 1.25" from the handle to about 18" then straight taper to .5". This knot is only about 12.75" out to the center of the knot. The limb is 1.5" wide. I guess I just leave it that wide there and 1.25" before and after.
Here is the knot in question. I know the line not centered this is also one of the areas my gizmo was too long for. The yellow lines it how I think I should handle this. Am I right?
Image
Here is better look of the area where you can see the curve in the wood my gizmo jumps over.
Image
Now top and side view of a modified gizmo. ( I would prefer on that had wooden pegs verses nails) Heck you could even put nuts in it where the nail holes area and screw in two pencils when getting the center line. Then just unscrew them and use for tillering. Why didn't I think of that sooner.
Top
Image
Side
Image
Well your input is need on that screwy knot.
Thanks,
Kelly

longbow steve
Posts: 3116
Joined: Tue Jan 30, 2007 3:29 pm
Location: BLUE MOUNTAINS

Re: thought Yall might like this, My osage adventure. Updated 21

#22 Post by longbow steve » Sat Jan 22, 2011 6:46 am

Looking good KellyG, just leave the limb wide on the side of the knot rather than both sides of the limb and if needed make the limb a bit thicker(depth) there. Talking from an aesthetic point of view :). Steve

User avatar
Stickbow Hunter
Supporter
Supporter
Posts: 11637
Joined: Sat Jul 26, 2003 8:33 pm
Location: Maryborough Queensland

Re: thought Yall might like this, My osage adventure. Updated 21

#23 Post by Stickbow Hunter » Sat Jan 22, 2011 9:13 am

longbow steve wrote:Looking good KellyG, just leave the limb wide on the side of the knot rather than both sides of the limb and if needed make the limb a bit thicker(depth) there.
+1!!!

Jeff

KellyG
Posts: 194
Joined: Tue Nov 09, 2010 5:53 am
Location: Riley, Kansas, USA

Re: thought Yall might like this, My osage adventure. Updated 21

#24 Post by KellyG » Sat Jan 22, 2011 7:41 pm

Thanks gents,
For the info once I get her layed out I will post pics before moving along.
Kelly

KellyG
Posts: 194
Joined: Tue Nov 09, 2010 5:53 am
Location: Riley, Kansas, USA

Re: thought Yall might like this, My osage adventure. Updated 21

#25 Post by KellyG » Sun Jan 23, 2011 5:52 am

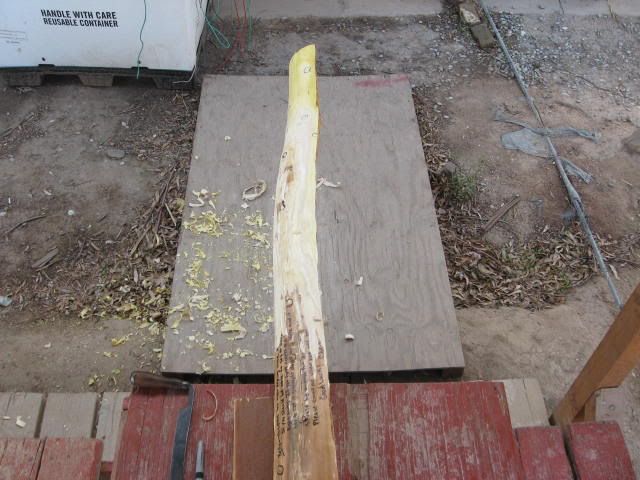
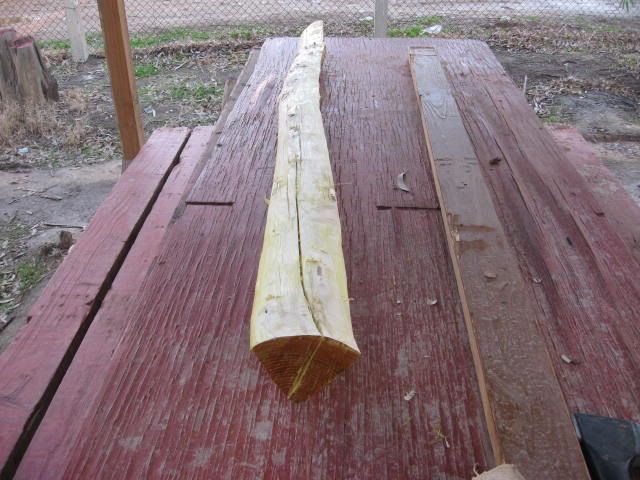
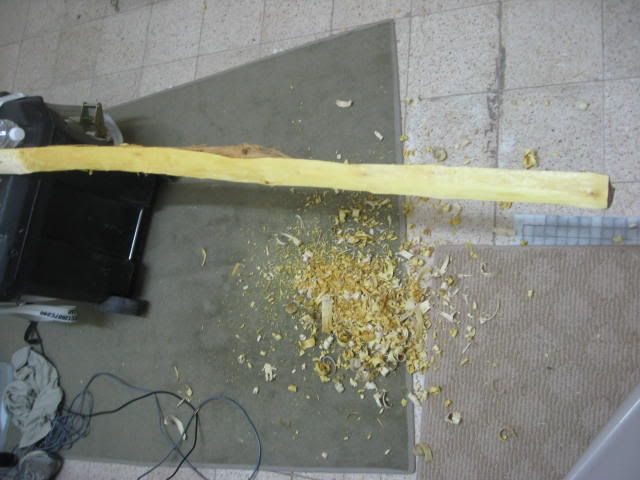
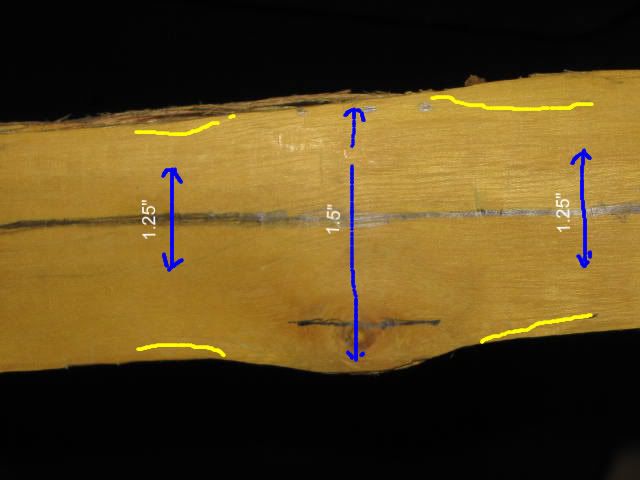
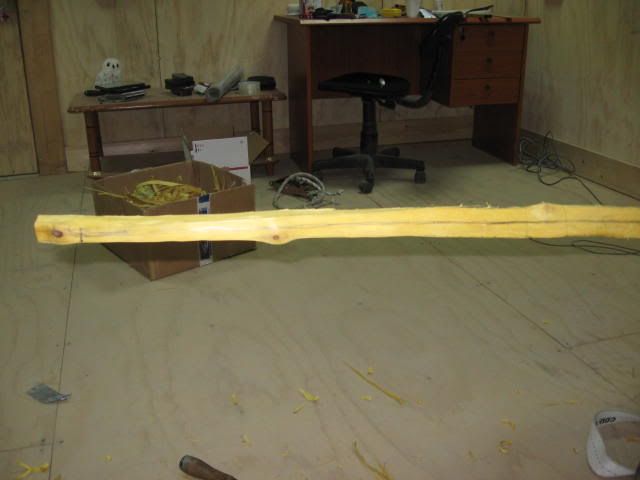
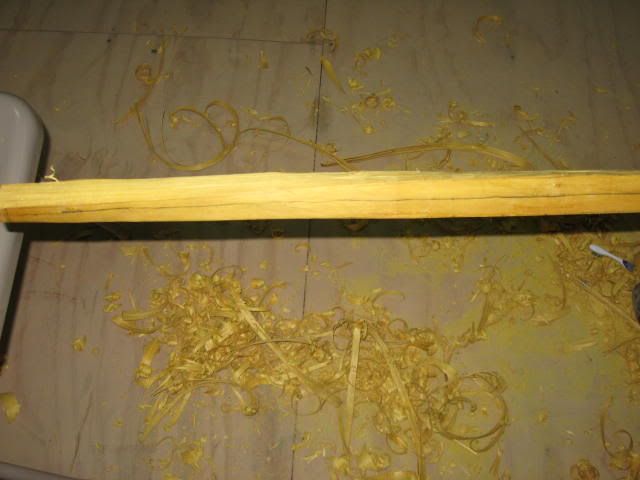
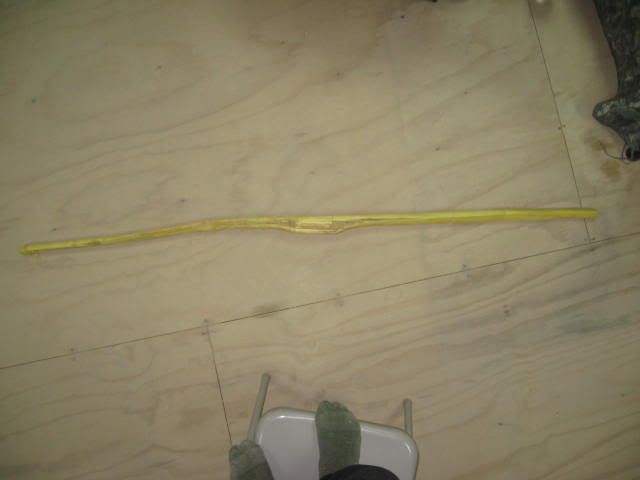
Ok tonight I laid it out. I have for now it will be 59" long, 4" handle, 1.25" from the fades to 18" then straight taper to 1/2" tips.
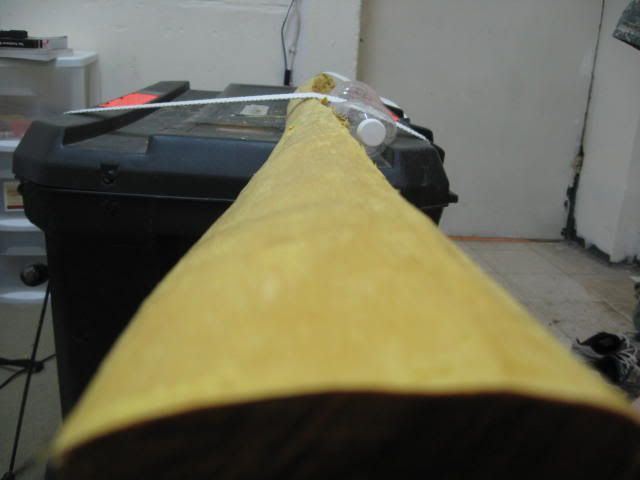
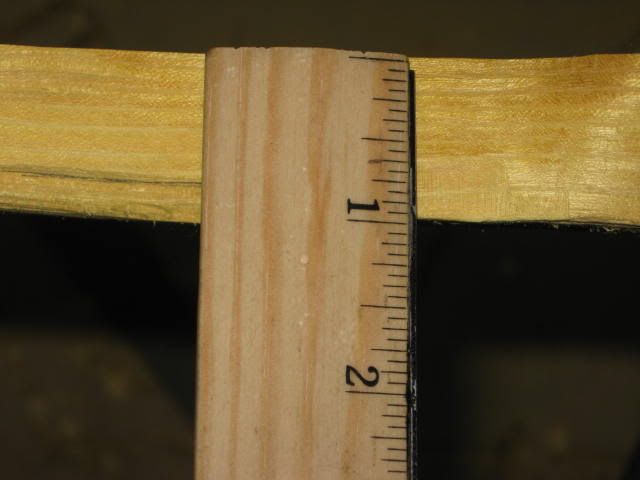
I have a few pic to share of course, but first let me explain how I did the actual drawing of the lay out. After I went over center with a much smaller gizmo, I then grabbed a measuring tape (insure it is flexible, stiff ones sit off the bow; and will be a problem). I put a pencil mark on the 2", 2 5/8" and 3 1/4" marks. I use the 2" because it give a little to hold over the side and the metal ends are hard to keep in place (you will see it in minute. I stared at the 18" mark and move back every 1" or so marking the width. I kept the 2 5/8" make on my center line and marked the wood at the 2" and 3 1/4" to give me the 1 1/4" limbs.
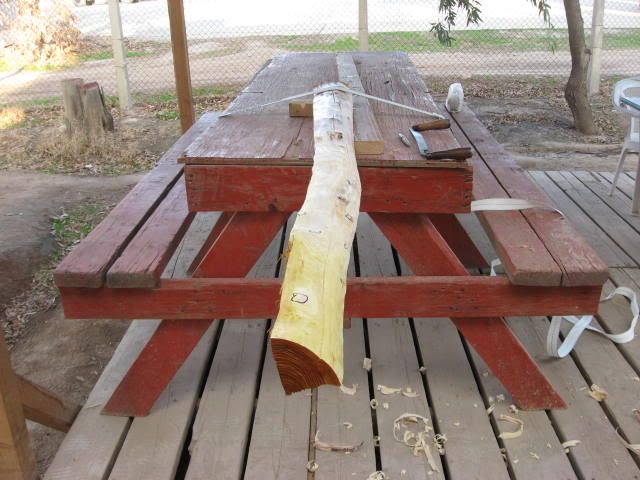
See like this, just keep moving towards the handle.
Image
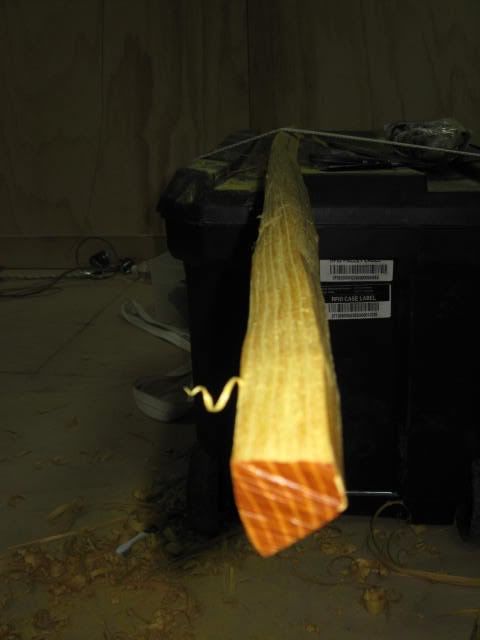
Then marked the tips 1/4 on each side of center. while there I put my tape on the 18" mark and the tip mark and wrapped the excess over the end to hold it in place. I made sure my tape was on both marks and started at the 18" mark holding the tape with my index, middle and ring finger, marked the taper by drawing a line using the tape as my guide. you have to take it slow and walk you finger down the tape, only mark in front of your 3 finger hold the tape down or it will push in our curl up. It will make for a curved or wavy line, don't ask me how I know. Also keep tension on the tape without drawing hand while walking you 3 finger to the next spot. All of this is harder to explain than it is to do.
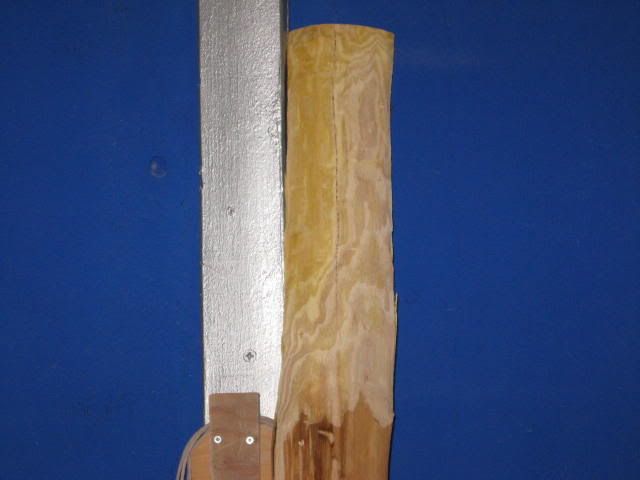
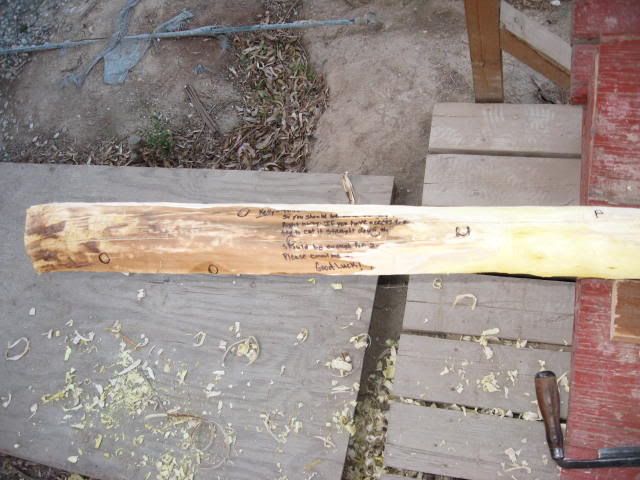
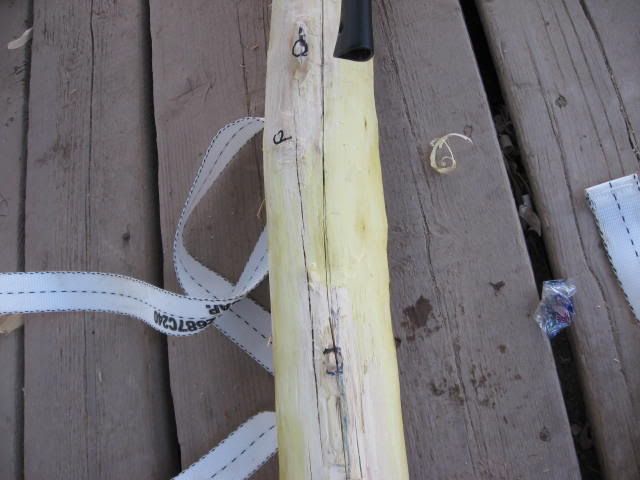
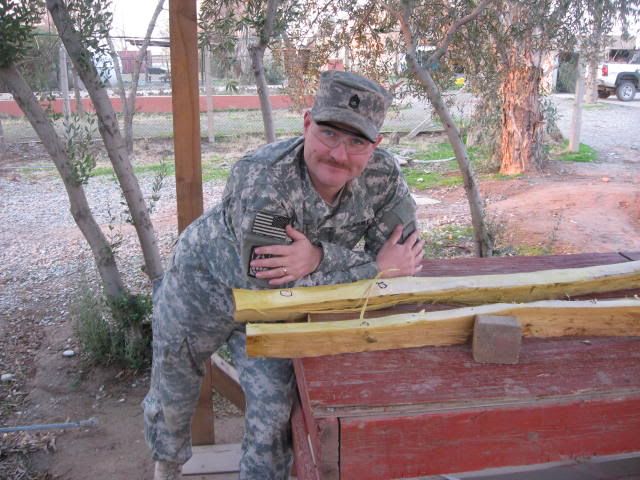
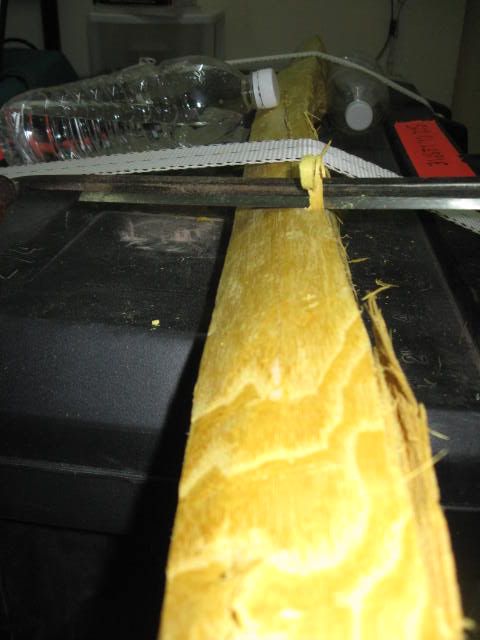
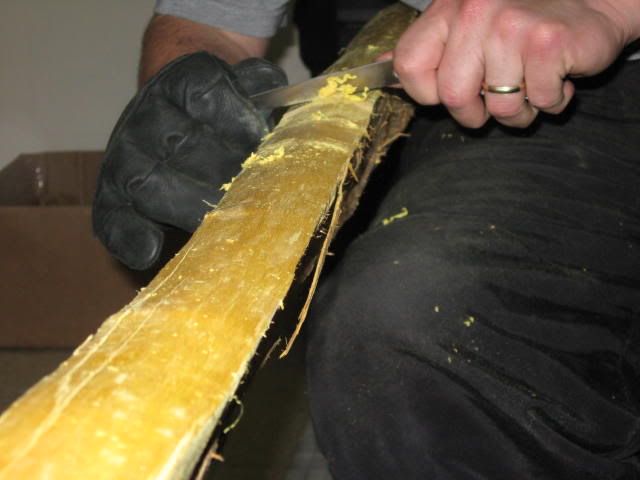
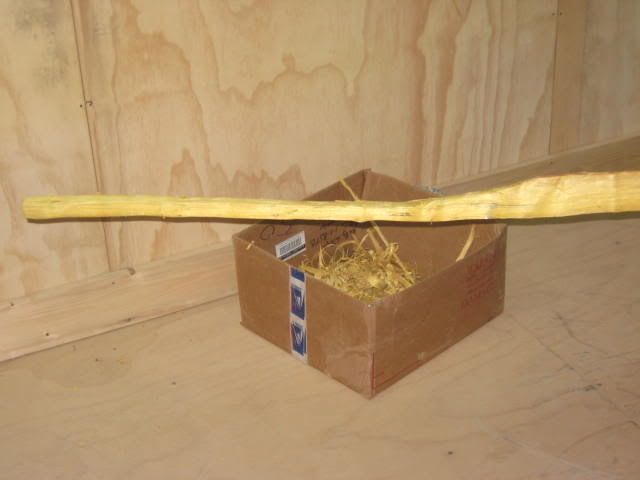
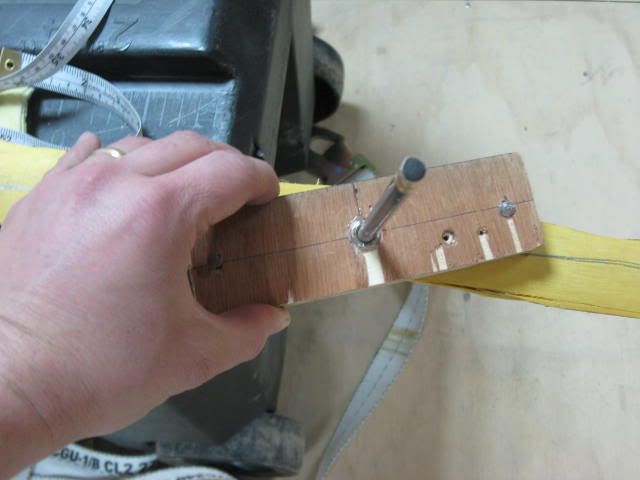
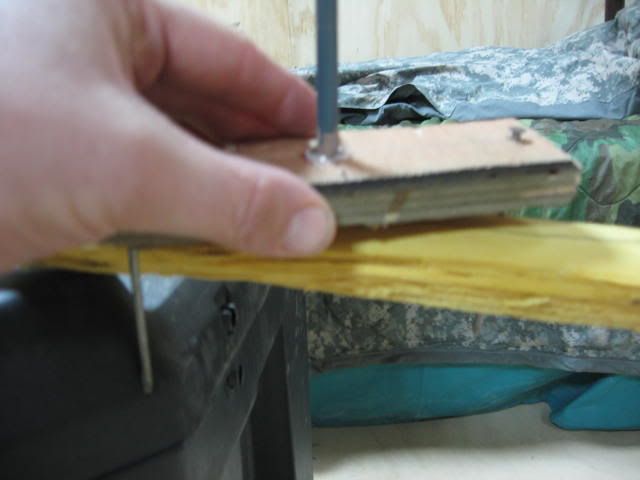
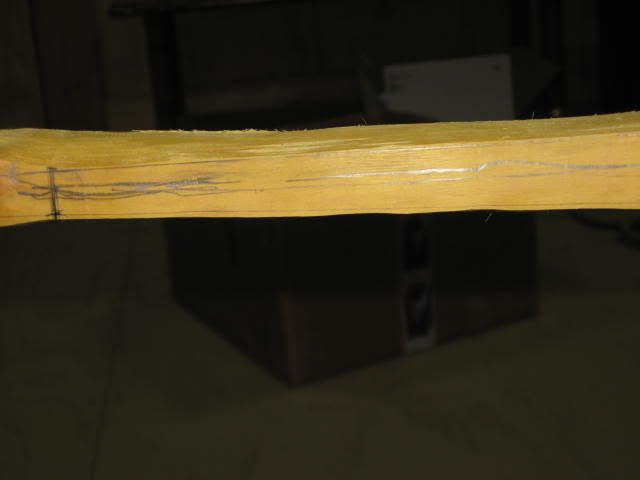
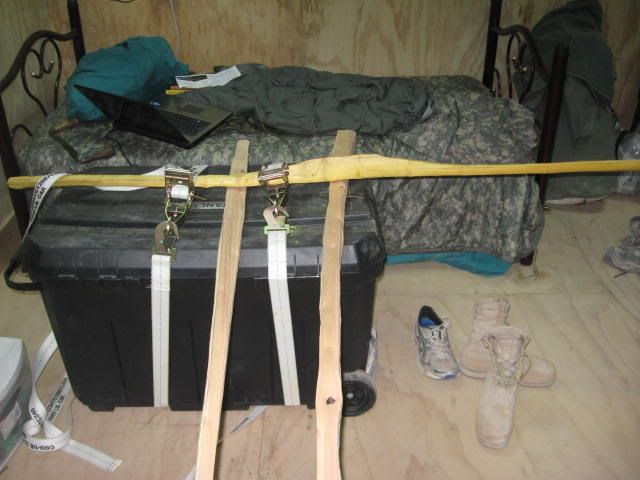
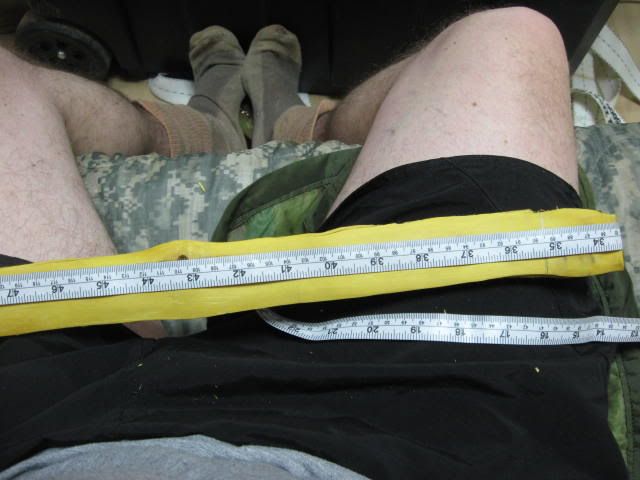
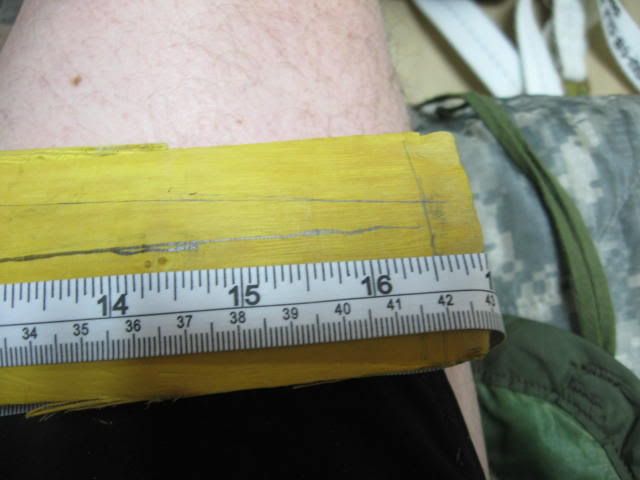
Both of these pictures show me lining it up and wrapping the tape over the end to hold with my leg.
Image
Image
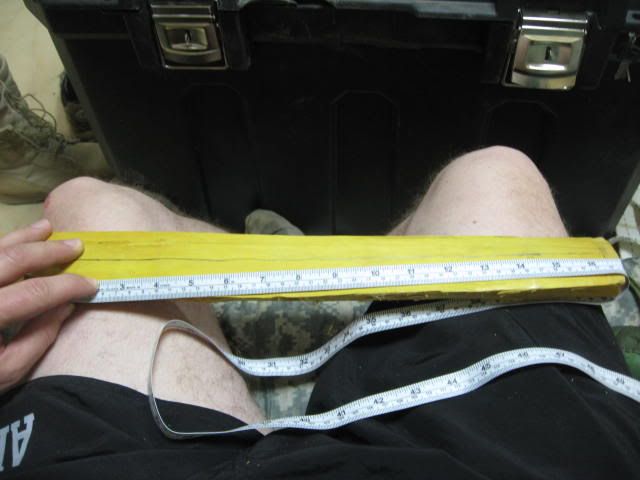
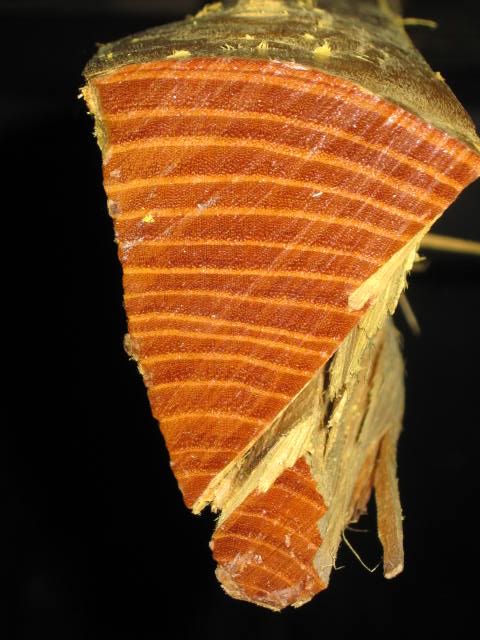
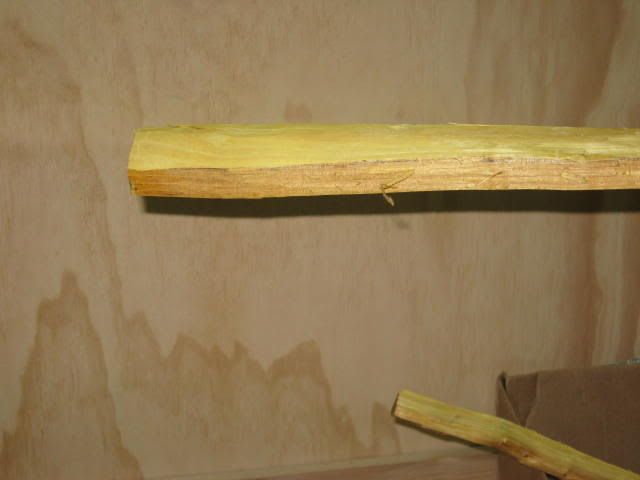
Better view of the end
Image
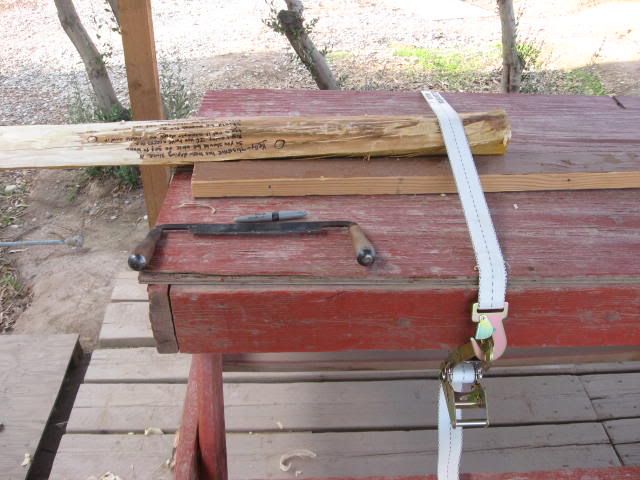
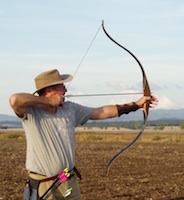
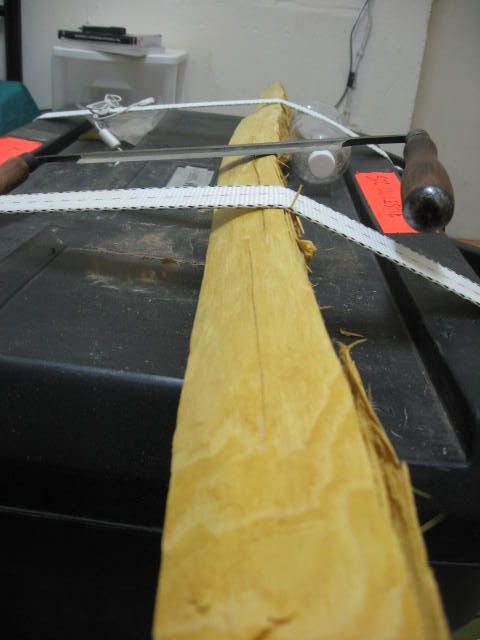
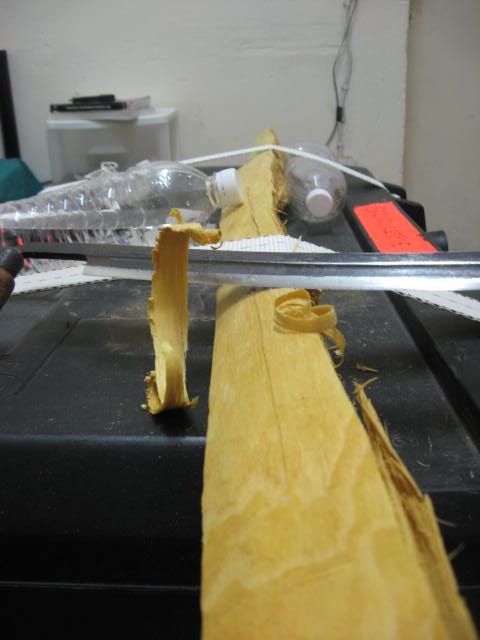
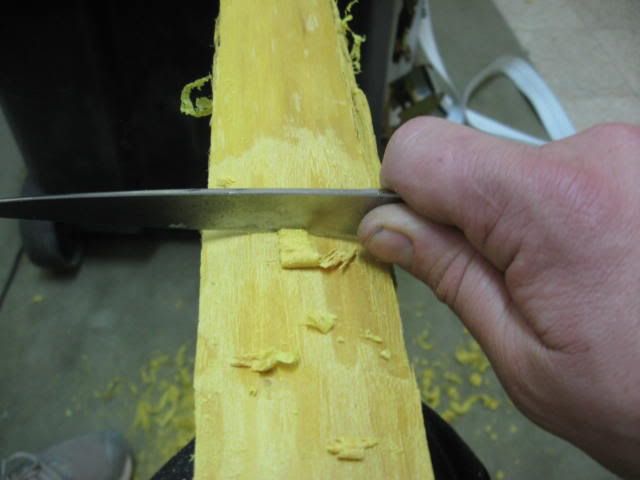
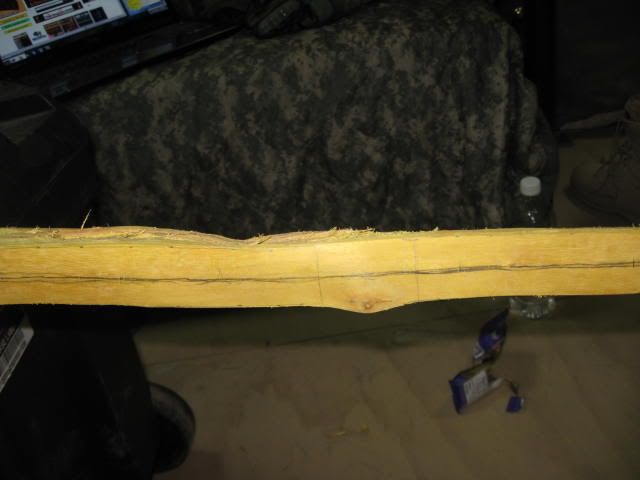
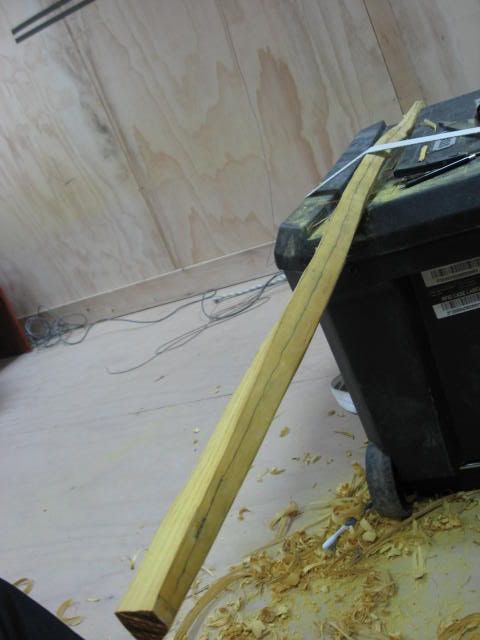
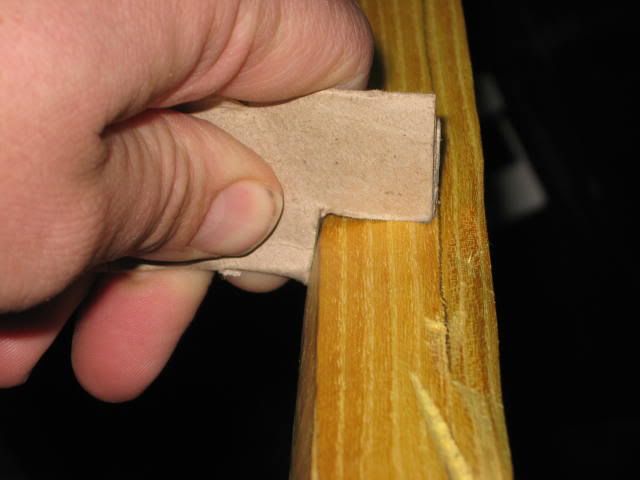
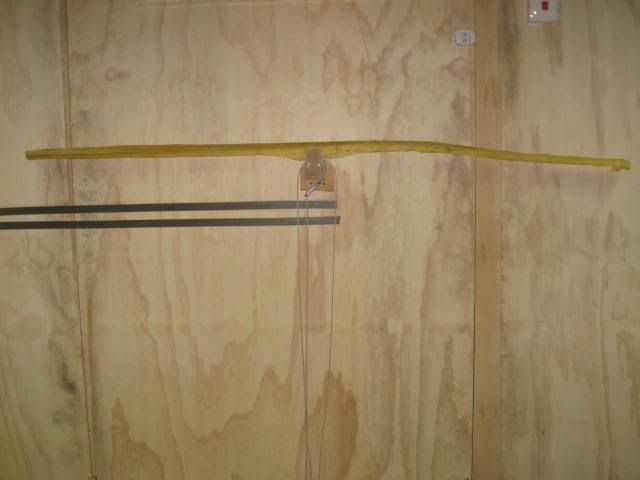
Now me holding tension with my drawing hand, cant show my 3 fingers walking because they are holding the camera silly.
Image
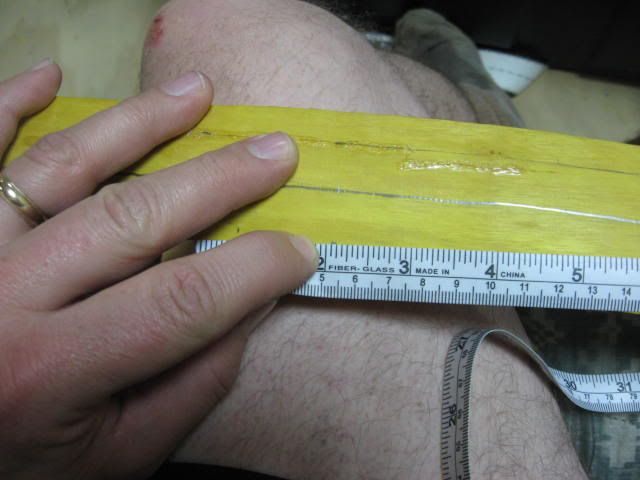
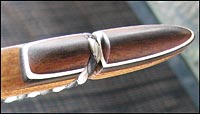
will notice in that pic the dots that make the width of the bow. they go from the 18" mark to the handle. I just put the tape on two and draw the line and moved to the next two all the way to the handle. If the wood is curvy keep your dots close if it is straighter open them up. Not so much you can't us one hand to keep tension enough to draw your line. You can see one line done in that pic. Go to the other end and repeat.
Hope this made since. This is how I did it and until the ones who have done it a bunch tell me a better way it is how I will do it again. I hope they don't tell me it is all wrong and I have to do it over, but until I get a thumbs up I ain't taking any wood off.
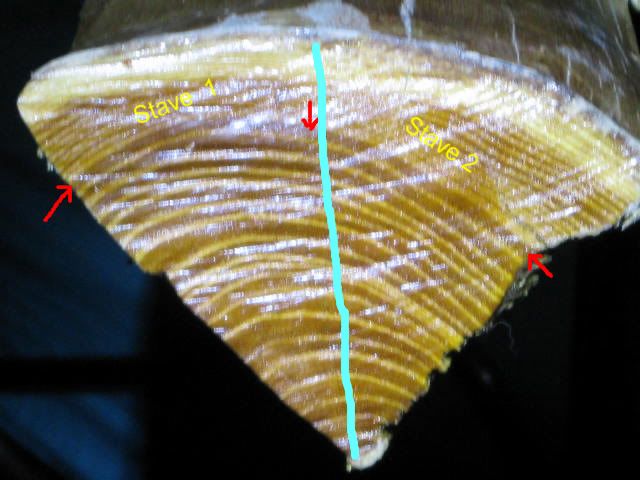
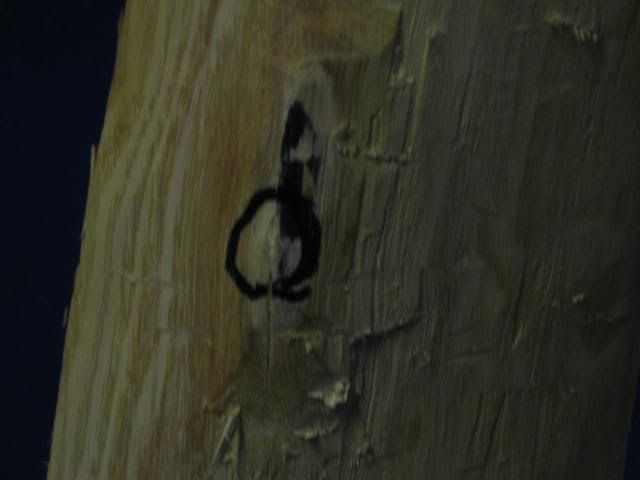
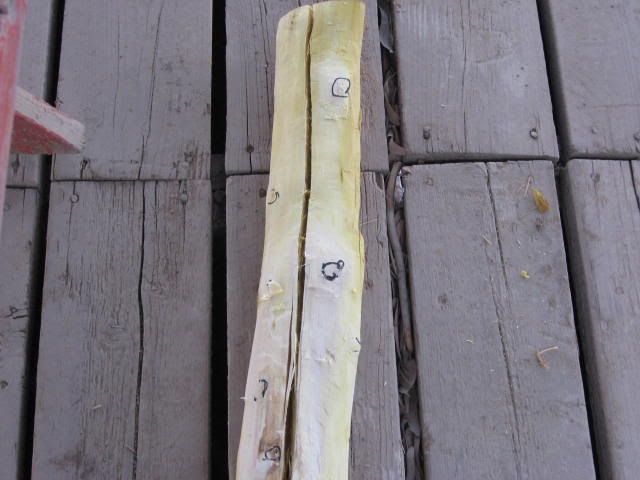
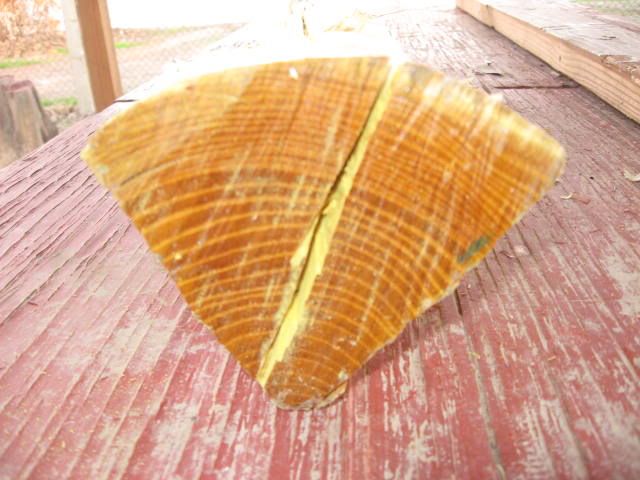
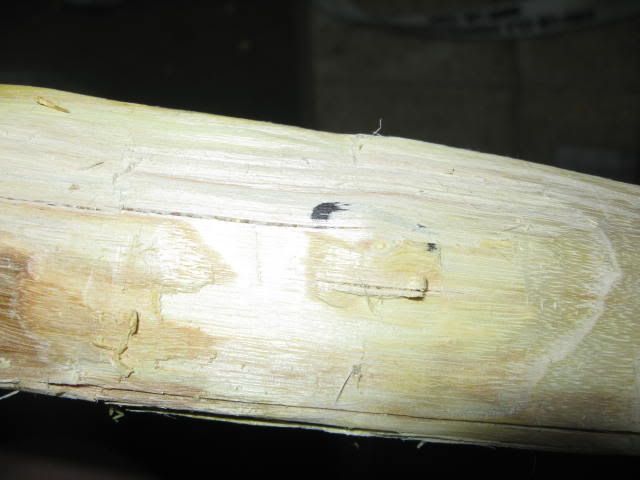
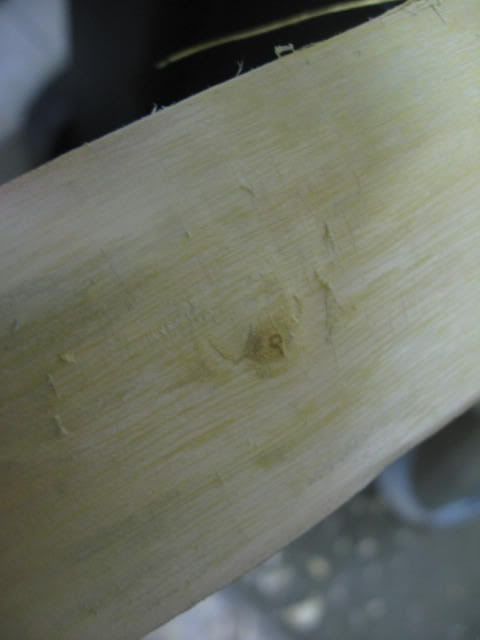
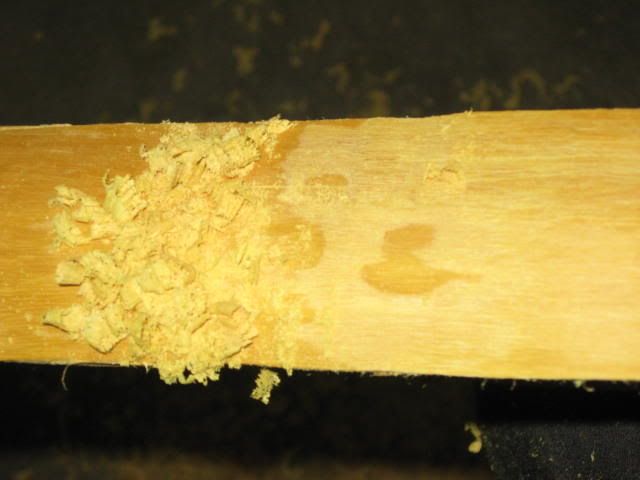
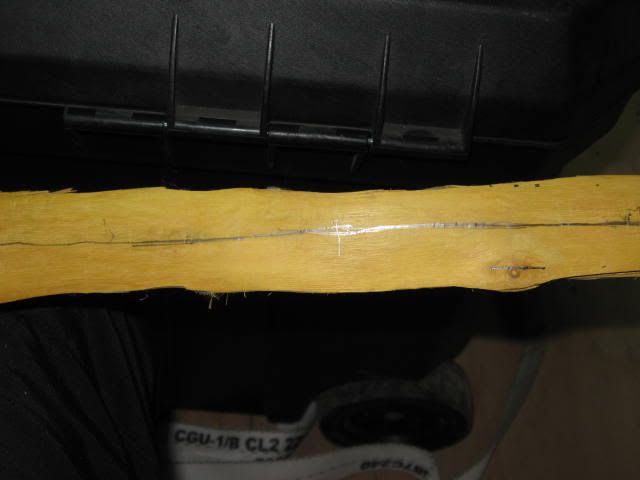
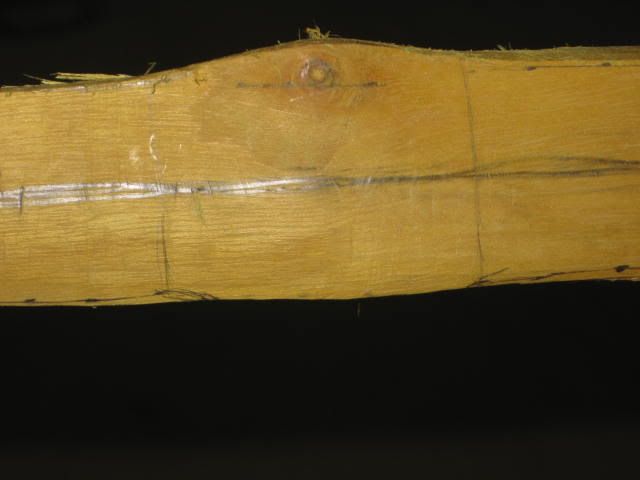
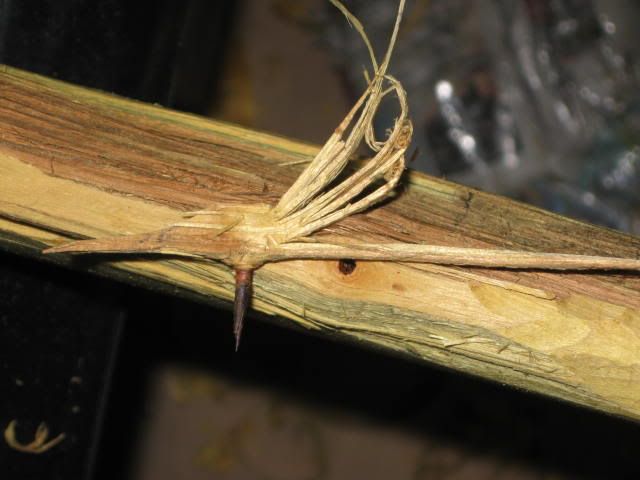
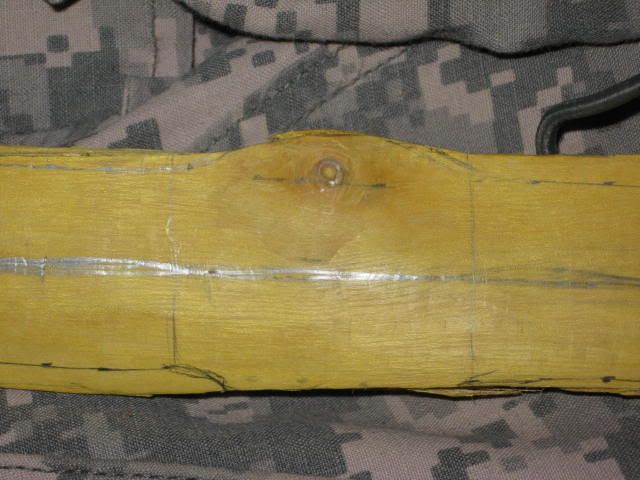
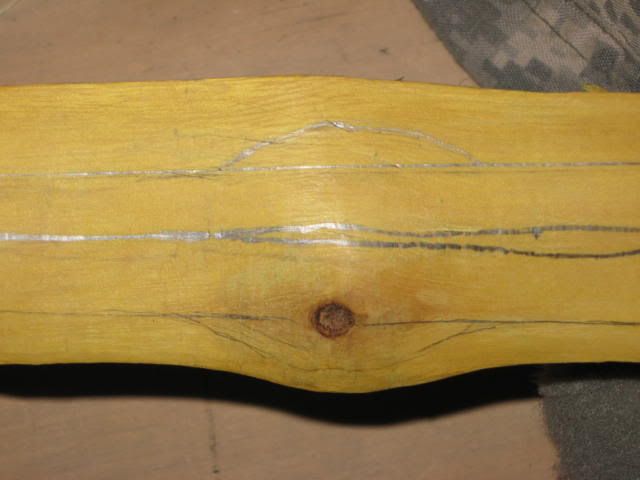
Oh almost forgot the knots yes more than one now.
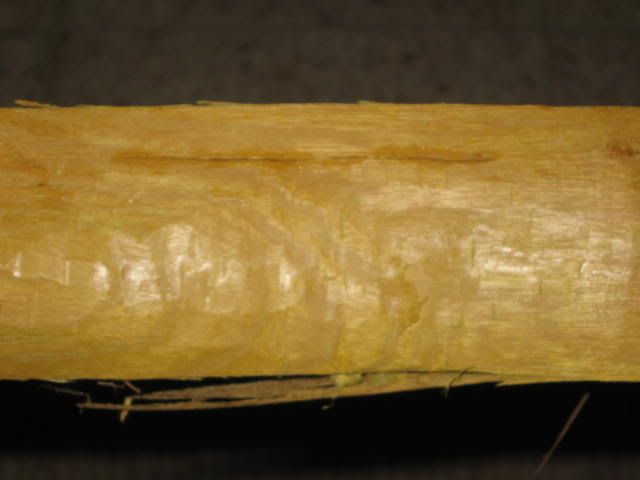
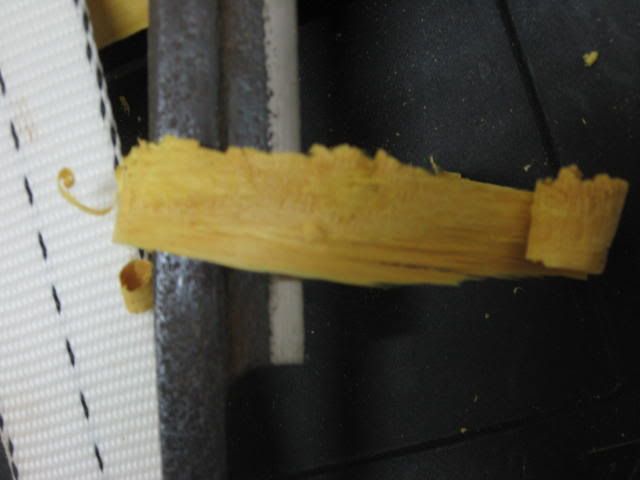
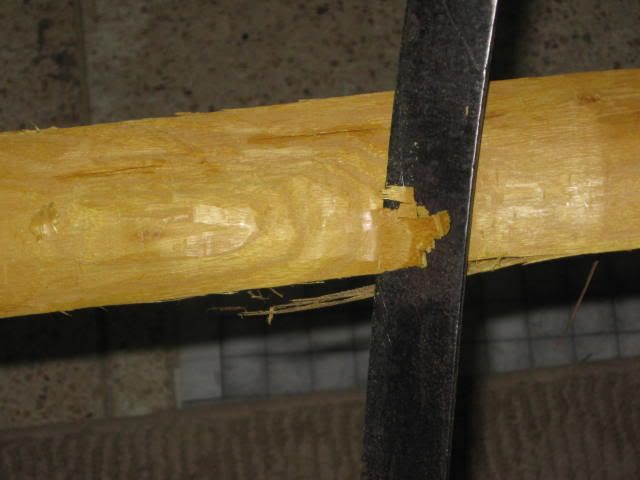
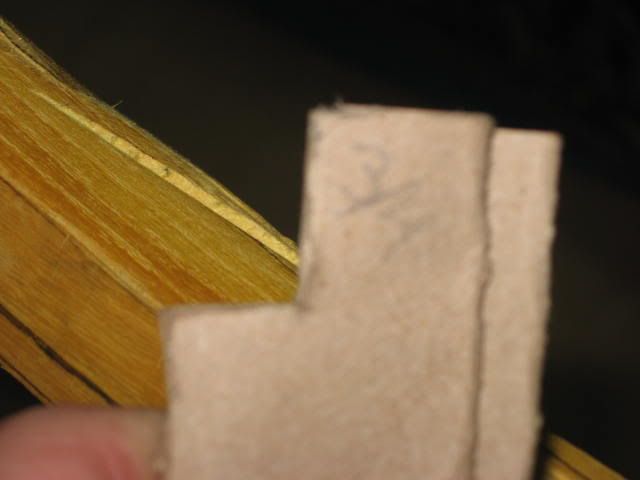
This is the one that I was asking about you see my intended solution of just making the limb wider. If I just cut it out I would be down to 1" there and no character. So it stays.
Image
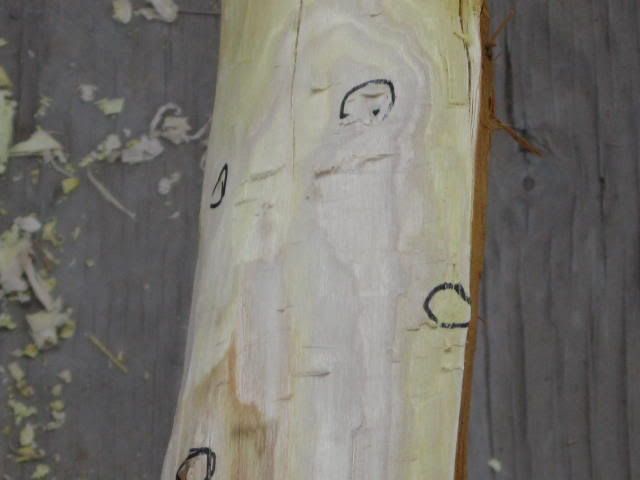
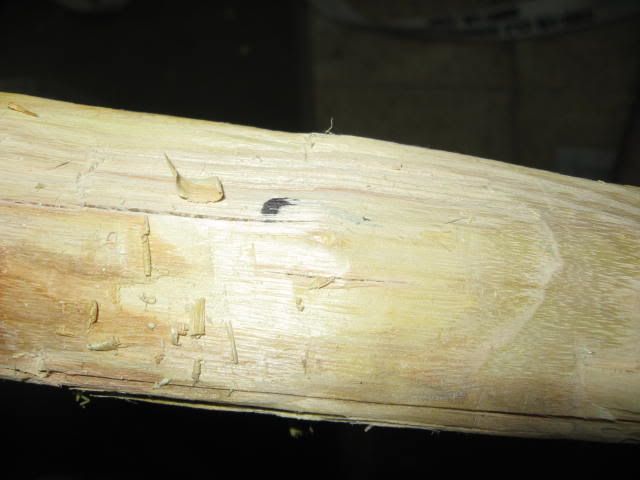
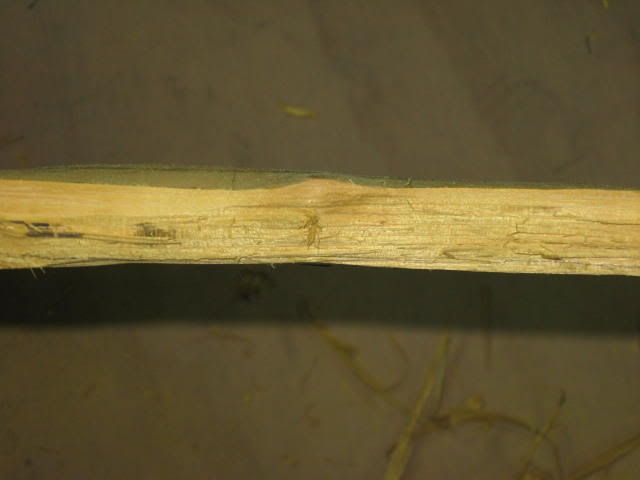
Here my line cut right thru the center, so more flare on this limb. Again around it. I will dig this one out a little the wood is very soft in this one.
Image
Ok that is enough, If I forgot something let me know if I need to add a pic of something let me know. I did not do a whole layout because my lines are too light to show up except the center one.
Thanks,
Kelly

User avatar
Stickbow Hunter
Supporter
Supporter
Posts: 11637
Joined: Sat Jul 26, 2003 8:33 pm
Location: Maryborough Queensland

Re: thought Yall might like this, My osage adventure. Updated 22

#26 Post by Stickbow Hunter » Sun Jan 23, 2011 8:16 am

Little by little mate. :D That isn't the easiest way to have to mark out a bow but I guess you have to use what you have. My only comment is that I would probably keep a little more wood around those knots, to start with at least, but be guided by others with more experience then me though.

Jeff

KellyG
Posts: 194
Joined: Tue Nov 09, 2010 5:53 am
Location: Riley, Kansas, USA

Re: thought Yall might like this, My osage adventure. Updated 22

#27 Post by KellyG » Sun Jan 23, 2011 4:57 pm

Jeff,
Thanks the wood around the knots is just what was left after I split it. I am in no rush and have the time sometimes so slow and steady.
Thanks again for looking,
Kelly

KellyG
Posts: 194
Joined: Tue Nov 09, 2010 5:53 am
Location: Riley, Kansas, USA

Re: thought Yall might like this, My osage adventure. Updated 22

#28 Post by KellyG » Mon Jan 24, 2011 3:54 am

Ok today I took wood off the sides and got crooked stick. I still have to take some wood off but need some answers to some important questions first.
1) The knotty end tapers from 7/8" belly to my 1 1/4". I have 7/8" thickness from the belly to back on the limbs so I still have wood. the question here is doe I reduce the thickness more and make my limbs as wide as the belly? Or stop here and reprofile the back down to 1"? which seems narrow. Or is a reverse trap ok with Osage?
2) We will see the twist and bends here in a bit with the pics I have posted. To heat and get it somewhat straight I will think I will use a piece of 4x4 and us metal bands like pat did but without the clamps. Screw a rounded block of wood at a bend heat and bend as straight as I can, and 550 cord and lash it down.
The twist I think will be easier, sandwich it between 2x4s. one set at the tip and the other about the beginning of the twist heat and untwist.
Any brain storming is good. I make you really appreciate our ancestors and how they did it with stones and no vice.

Well let's take a look shall we. Oh tools used here drawknife, file and toothbrush (to clean teeth with, of the file that is). Draw knife was used to get to about 1/8" to my lines then file down.
Here is the knotty end
Image
closer view of its tip area
Image
The more troublesome knot, with wood removed from it.
Image
this shows how the knot is over hanging a little
Image
and the other knot I just show how I just went straight instead of leave wood on the none knot side; like I had drawn. See I do listen. I even did it to both knots.
Image
Now for the twisted end
Image
twisted end this one is really trapped the narrow (the narrow side is the back, wide the belly)
Image
my thickness at this point on both ends
Image
One of the whole thing
Image
Ok I am ready to learn Ole masters of the yellow wood, hear my plea and give me your sage and wise advise. Pretty Please
Thanks,
Kelly

User avatar
UPTHETOP
Posts: 1187
Joined: Mon Jun 11, 2007 9:03 pm
Location: Dalby
Contact:

Re: thought Yall might like this, My osage adventure. Updated 23

#29 Post by UPTHETOP » Tue Jan 25, 2011 8:46 am

Kelly'' man'' its turning into a barber's pole mate best of luck.

Cheers Wayno
Justastik Arrow Craft, Its all about the Wood.

KellyG
Posts: 194
Joined: Tue Nov 09, 2010 5:53 am
Location: Riley, Kansas, USA

Re: thought Yall might like this, My osage adventure. Updated 23

#30 Post by KellyG » Wed Jan 26, 2011 12:45 am

Ok tonight it is looking like a bow. Not bending like one yet but looks like one; a little.
Ok fist I strapped it down and tried something new. I put two stick a cross my box and the stave on that as strapped it down. ( may put a 2x4 or a 4x4 over the sticks and if and when I try to take out some of the twist and bends).
Image
Measure the thickness make sure you are measuring from the back. I made that gage out of a paper towel role.
Image
Make sure you also mark you gages, you would not want to use the wrong end. Don't ask me how I know, just go head and mark your gages.
Image
I used the draw knife to bring it down to my line. Checked floor tiller and there is some flex not much at all but some. A very little more in the knotty limb. Here is PICs of the side Profle
on the floor (it bows to much to put on the tree this way.
Image
on the tree. well future. I need to run the tape across the other side, then go down a bout 25" or so from the top of the first piece. the tape is 1" wide so it will be fairly easy to put up and take down later.
Image
Ok pulled this sucker out where the handle and fade meets.
Image
The limbs are at 3/4" I will take them down to 5/8" tomorrow. My new room the walls are just too thin so I do not want to keep the neighbors up.
Oh if I were to make the Knotty limb the bottom I would have to add on a shelf off the side of the bow just to make it a center shot. I will try and get some string on it tomorrow . This will be just to give me and Ideal of how far off center it really is.
Well as all was let me know,
Kelly

Post Reply