Everybody loves a horsebow

Where to source materials etc. Also the place to show off your new bow or quiver etc.... Making things belongs in Traditional Crafts.

Moderator: Moderators

Post Reply
Message
Author
wheres the myrtle
Posts: 62
Joined: Mon Oct 18, 2004 4:53 pm

Everybody loves a horsebow

#1 Post by wheres the myrtle » Wed Mar 14, 2007 7:49 pm

Well :D ....almost everyone and that includes me.

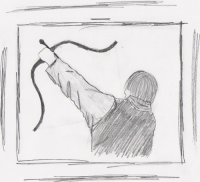
So last week i decided to embark :shock:

It's not the traditional method..but it seems to work.

The aim was light between 25 and 35 to be honest i wasn't sure what i'd get weight wise but i figured two lams pretty low.

35mm wide very thin boo back and belly, two tapered cores a tapered ironbark back side, and a tapered oak belly side, both lams put together total from about 4mm at riser to 2 1/2mm at the siyahs......

Tassie oak riser and siyahs, the handle will be worked on later to jaz it up somewhat....

I didn't think to document till well into the process so i don't have the glue up pic of the riser and siyahs to the sole lam first up....

Anyway here is the rest of the process,

I did the one lam to siyahs and handle first and then did it by halfs.... glued up one side waited a day spun her round and glued up the other side then baked for 8 hours
Attachments
thats at about 23, zero tillering, just lots of exercise, prolly  can't tell from side on but she bends very even, 36# at 27"
thats at about 23, zero tillering, just lots of exercise, prolly can't tell from side on but she bends very even, 36# at 27"
IM002075.JPG (34.19 KiB) Viewed 2455 times
low brace
low brace
IM002069.JPG (122.33 KiB) Viewed 2455 times
IM002070.JPG
IM002070.JPG (128.04 KiB) Viewed 2455 times
IM002050.JPG
IM002050.JPG (21.31 KiB) Viewed 2455 times
result
result
IM002048.JPG (51.68 KiB) Viewed 2455 times
glueup
glueup
IM002043.JPG (114.6 KiB) Viewed 2455 times
lams
lams
IM002046.JPG (60.04 KiB) Viewed 2455 times

User avatar
Graeme K
Posts: 629
Joined: Thu Feb 02, 2006 9:38 pm
Location: Sydney Glenorie

#2 Post by Graeme K » Wed Mar 14, 2007 9:32 pm

Hi Wheres the Myrtle
That is really neat. It seems like a very simple build and the results are great. The drawn profile is very smooth and even. Have you ever tried this before ? Can not help wondering if it is reproducible or if you got lucky --- no criticism intended but most of the people who have tried this( including myself ) have had both tillering and limb twist issues so if there is some way to overcome the problems I would be very interested.
Don't know where you live ( no location in profile ) but I would love to see the bow in the flesh.

Cheers Graeme

wheres the myrtle
Posts: 62
Joined: Mon Oct 18, 2004 4:53 pm

#3 Post by wheres the myrtle » Thu Mar 15, 2007 12:02 am

No offense taken Graeme :)

I certainly hope it's reproducible, the next plan is to add another core and get it one hitting somewhere near heavy....

Live in gippsland.

Glue lines are not perfect on this one.

A couple of things to note.....with Bamboo and recorcinol limb twist is easily dealt with by heatgun, just slightly over compensate for what you want brace in position till it cools and bingo, the process may need repeating.
As far as the tiller, i'm not adverse to sanding a little boo off the belly if needed, But also and prolly most importantly i take a 90" boo pole and turn it into 3 30" boo poles....all 4 lams for one bow will come out of one 30" section...(even nodes) nodes on belly will sit directly in between nodes on the back if at all possible, we're looking for symmetry...I even go so far as to try and find even crown boo when splitting sections.

The toughest task when gluing bamboo back and belly bows all in one is glue lines very hard to get every little area snug (VERY HARD). i imagine doing this with glass would be somewhere next to BASIC.

Also the two half theory makes absolutely sure both limbs are glued up identical.

Just BTW,

1 bamboo pole $20...3 bows about $7 a bow

I $5 meter long tassie oak 1 1/2 by 4 a bow

ironbark lam FREE :D

150g glue

Bit of Dacron

not quite sure on the finish....

But i'm pretty sure i can get this thing in under about $20 :shock:

It's 60" NTN.

Back to the Cricket

Mark.

User avatar
yeoman
Posts: 1563
Joined: Mon Mar 08, 2004 1:32 pm
Location: Canberra

#4 Post by yeoman » Thu Mar 15, 2007 8:22 am

awesome job!
https://www.instagram.com/armworks_australia/

Bow making courses, knife making courses, armour making courses and more:
http://www.tharwavalleyforge.com/

Articles to start making bows:
http://www.tharwavalleyforge.com/index. ... /tutorials

User avatar
Graeme K
Posts: 629
Joined: Thu Feb 02, 2006 9:38 pm
Location: Sydney Glenorie

#5 Post by Graeme K » Thu Mar 15, 2007 8:40 am

Hi Mark
The bamboo idea - all from the same piece - is a real good idea and one that I have considered trying but the place I have been getting my boo seems to only sell large dia in pre split sections so I have not been able to try it. ( where do you get your boo )
The heat correction sounds like an inspired answer to the twist and may have been how it was done in ancient times -- I have never used recorcinol only epoxy so it is a thought that had not occurred to me as the epoxy would not like the heat t-- sure sounds good now though.
I know what you mean about getting good glue lines with boo front and back - the boo tends to curl up at the thin outer edge and no matter how many clamps you use the join is ugly. I solved the problem by making a steel former out of 8mm flat bar which I also cut to the profile of the bow I then put a 5mm layer of closed cell foam on the steel to conform to the curved surface of the boo . I then use cut strip of innert tube to wrap it with which gives even pressure that pulls the edges together and this has given me good results.
Sure hope your next attempt works well as I would dearly love to have a success with a horse bow.
I am planing to take a Holiday down Vic way in a while so I may have the opportunity to swing by and say HI.

Graeme

User avatar
greybeard
Supporter
Supporter
Posts: 2992
Joined: Tue Feb 07, 2006 9:11 am
Location: Logan City QLD

#6 Post by greybeard » Thu Mar 15, 2007 8:46 am

Hi WTM
You've done an excellent job with the first one.
I would imagine there will be a few more coming of the form.
Best of all though is the price. :D

Daryl.
"And you must not stick for a groat or twelvepence more than another man would give, if it be a good bow.
For a good bow twice paid for, is better than an ill bow once broken.
[Ascham]

“If a cluttered desk is a sign of a cluttered mind, of what, then, is an empty desk a sign?” [Einstein]

I am old enough to make my own decisions....Just not young enough to remember what I decided!....

wheres the myrtle
Posts: 62
Joined: Mon Oct 18, 2004 4:53 pm

#7 Post by wheres the myrtle » Thu Mar 15, 2007 12:28 pm

Thanks fellas.

Graeme,

Anytime mate.

The boo i just ordered into a local garden supply, 110mm diam, i told the bloke i wanted em clean and crack free, i got neither unfortunately, he still has one because it's just plain unusable, (2 out of 3 have been alright though) i want the 125-160 2.9 bleached poles from bamboo-oz $66, but i just received an e-mail back informing me that they are currently out of stock and that freight will sting me another $66(reckon i could ask em to cut her down and split em up for me :lol: save on freight 8) )

Resorcinol withstands exposure to boiling water according to the specs so yeah while using boo it will remain my glue of choice.

Those little wood chocs you see under some of the clamps are the inside of the bamboo that was my way of getting around the glueup problem...problem is you need more holes and even more clamps than i'm currently using....yours sounds like a good idea, i also wouldn't mind trying a half inch rubber strip either.

Mark.

User avatar
MaylandL
Posts: 756
Joined: Wed Feb 09, 2005 11:39 pm
Location: Perth
Contact:

#8 Post by MaylandL » Sat Mar 17, 2007 11:25 am

Looking great!

Definitely looking forward to seeing the finished product and how it shoots. If you are ever in the Great Southern Shoot in Oct this year, look us up, my wife and I will be shooting the horsebows :) 8)

Happy shooting and outstanding work!
They'll never hit us from this dist....

User avatar
greybeard
Supporter
Supporter
Posts: 2992
Joined: Tue Feb 07, 2006 9:11 am
Location: Logan City QLD

#9 Post by greybeard » Sat Mar 17, 2007 10:37 pm

Hi Mark,
I am interested in they way you incorporated the string bridge in the siyahs. Where they over size in the glueup and then reduced after the bow was on the tiller stick or did you have a predetermined plan.
Keep up the good work,

Daryl.
"And you must not stick for a groat or twelvepence more than another man would give, if it be a good bow.
For a good bow twice paid for, is better than an ill bow once broken.
[Ascham]

“If a cluttered desk is a sign of a cluttered mind, of what, then, is an empty desk a sign?” [Einstein]

I am old enough to make my own decisions....Just not young enough to remember what I decided!....

wheres the myrtle
Posts: 62
Joined: Mon Oct 18, 2004 4:53 pm

#10 Post by wheres the myrtle » Sun Mar 18, 2007 8:32 pm

Thanks ML.

Over sized and then reduced Daryl, i had a rough idea of what i wanted but it was basically design as you go type stuff :D

Mark.

User avatar
Graeme K
Posts: 629
Joined: Thu Feb 02, 2006 9:38 pm
Location: Sydney Glenorie

#11 Post by Graeme K » Sun Mar 18, 2007 9:04 pm

Hi Mark
Really like the design of your bow -- Im sure it will shoot as well as it looks.
Hope to see some full draw photos soon and hear how it performs .

Graeme

User avatar
archangel
Posts: 750
Joined: Fri Oct 08, 2004 7:26 pm
Location: York, Western Australia

#12 Post by archangel » Tue Mar 20, 2007 1:44 pm

Good work Mark. I really like the classic flowing lines of this bow, from the handle right to the ends of the siyahs. By the calculations you supplied, just one more lamination would have given the weight you were after. Your thread and photos have got me going to try another one soon, copying the idea of building the string bridge into the siyah.

Post Reply