Seeking advice - My first selfbow

Where to source materials etc. Also the place to show off your new bow or quiver etc.... Making things belongs in Traditional Crafts.

Moderator: Moderators

Message
Author
User avatar
Timmah
Posts: 83
Joined: Sun May 21, 2006 8:12 pm
Location: Canberra, Australia

Seeking advice - My first selfbow

#1 Post by Timmah » Sun May 21, 2006 8:23 pm

Hi guys,

Well i have decided that its time to try my hand at making a selfbow. I would like some advise as to which wood i should use to attempt my first bow. Is it possible to use wood from the local hardware/lumber yard? I was thinking about using Jarrah as its not to hard to get and i love the colour. I have been doing a fair bit of reading on the subject and understand i need something with very strait grain.

I will also need some new tools. My toolbox contains a few... screwdrivers and possibly a hammer if I'm lucky ;-)

Cheers,
Tim

User avatar
kimall
Posts: 1426
Joined: Tue Jun 08, 2004 9:21 pm
Location: Toowoomba

Wood

#2 Post by kimall » Sun May 21, 2006 8:31 pm

Hi Tim and good luck on your new adventure.I have made a selfbow but am no expert but did have one hold together for a while.I used a spotted gum floor board and these are normally pretty easy to find but take the time to go through as many as you can to find one with nice straight grain.
After that you really only need a rasp and a scraper and a tiller tree and you are away.
Cheers KIM

hellier
Posts: 244
Joined: Tue Jul 05, 2005 12:35 pm
Location: Airlie Beach QLD

#3 Post by hellier » Sun May 21, 2006 8:50 pm

someone here once wrote that all you have to do is..cut away everything that is not a bow... :lol:
be prepared to break a few and be not disilussioned ( sic ) ...it's fun and rewarding and a self bow is 9/10's broke anyway...someone else said that too...hey originality aint my strong point....a rasp mate..you need a rasp...a 4'' grinder fer me but hey each to his own and time is pressing me....check out trad gang and similar for a totally devil may take the hindmost approach...and after all a bow is a thing of beauty and art
..... so what works for you ...works for you....and take pics too
I'd love to have a battle of wits with you.....but you appear to be un-armed.....

User avatar
Timmah
Posts: 83
Joined: Sun May 21, 2006 8:12 pm
Location: Canberra, Australia

#4 Post by Timmah » Sun May 21, 2006 11:39 pm

I have read a few postings/articles with people using floor boards. I thought floorboards would be to thin to create a selfbow from. What dimensions should i look for in a floorboard?

As for a tiller tree from what i have seen they are fairly simple to create. Is there any diagrams/buildalongs for a tiller tree? I could probably just knock one up from the pics on here if not.

User avatar
Graeme K
Posts: 629
Joined: Thu Feb 02, 2006 9:38 pm
Location: Sydney Glenorie

#5 Post by Graeme K » Mon May 22, 2006 9:37 am

Hi
The tillering stick just has notches each inch down its lenght to hook the string and maby a bit of an indent or a upstand on the top for the bow. Needs to be 900 -1000mm long.

Graeme

User avatar
yeoman
Posts: 1563
Joined: Mon Mar 08, 2004 1:32 pm
Location: Canberra

#6 Post by yeoman » Mon May 22, 2006 9:52 am

Timmah,

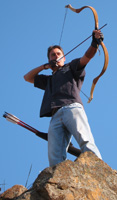
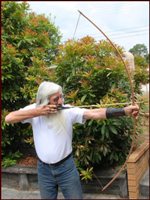
congratulations on deciding to make a selfbow. As far as I can tell, no one ever wants to make 'just one' though, so be prepared.

Floorboards are thick enough to make a bow. It is possible to go as thin as 15mm, depending on the wood, and glue on an extra bit in the middle to make the handle thicker. If possible though, try to get 19mm or thicker. For a bow, especially your first, you won't need any wider than 40-50mm.

As far as tools go, you won't need a great number, but generally, the fewer the tools, the longer it takes. Don't think of this as a drawback, however, as the first few should be made at an amble, because rushing things can quickly lead to broken bows.

This is the minimum tool kit that I would recommend, budget permitting:

250mm Stanley Surform or Trojan Surshape woodworking tool.
Hacksaw.
Wide chisel.
Hammer.
1/2 round rasp.
1/2 round file.
Sandpaper.
Vice or shaving horse. (It's far mor likely that you'll have a vuce than a shaving horse I'm sure.)

In fact, not only is this my minimum list, it is my current list of tools in my toolbox, plus a power planer, and can quite capably make bows with them alone.

As for wood, I believe that Jarrah would make a beautiful bow, buty in my experience, it is more sensitive to grain orientation than other woods. This isn't a great problem though, as I recommend that beginners back their first few bows, just to increase the safety.

It is possible to use local hardware shop timber. Go for the heaviest, darkest colored boards if the timber happens to be labelled with some erroneous title like 'Australian Ash' or 'Australian Hardwood'. Apart from Jarrah, what other positively identified timbers do you have access to?

I have to go soon, so I'll have to leave it there for now, and do another post later talking about what exactly to look for in a board to make a bow from.

Sorry I couldn't put in all in one post, but I gotta dash.

Cheers,

Dave
https://www.instagram.com/armworks_australia/

Bow making courses, knife making courses, armour making courses and more:
http://www.tharwavalleyforge.com/

Articles to start making bows:
http://www.tharwavalleyforge.com/index. ... /tutorials

User avatar
greybeard
Supporter
Supporter
Posts: 2992
Joined: Tue Feb 07, 2006 9:11 am
Location: Logan City QLD

#7 Post by greybeard » Mon May 22, 2006 10:04 pm

Hi! Timmah,
You have made the right choice in wanting to make your own selfbow. Milled boards are a good way to learn the basics of making a selfbow and if it doesn't work all you have lost is a couple of dollars but will have probably gained a wealth of knowledge. Basic tools will do the job but will require a lot more elbow grease. I have found that the most useful tools for making a selfbow is the old spokeshave. The one I use is about eighty years old (it was my Grandfathers') still with the original blade and works as well as the day it was made.
Best of luck with your exciting journey into selfbows,

Daryl.

User avatar
Timmah
Posts: 83
Joined: Sun May 21, 2006 8:12 pm
Location: Canberra, Australia

#8 Post by Timmah » Sat May 27, 2006 11:14 am

Thanks for your advice guys.

Ok so i have all the tools listed above + a few more that looked like them might be handy...

As for wood so far the only thing i can find that has a name on it is Tas Oak and something called Meranti. Any advice on either of these?

I'll make my tiller tree today. I have some good hardwood that i have recycled from an old coffee table that should work nicely.

Cheers,
Tim

User avatar
greybeard
Supporter
Supporter
Posts: 2992
Joined: Tue Feb 07, 2006 9:11 am
Location: Logan City QLD

#9 Post by greybeard » Sat May 27, 2006 8:13 pm

Timmah,
When selecting floor boards try to select boards that have been cut from late growth not early (heartwood) as heartwood does not have as good bending properties. The flatter the growth rings the better. If you want to spend the extra dollars hard rock maple is a good choice but for your first attempt floor boards is an economical alternative. In most cases floor boards are more suited to flat bows. Another choice could be clean milled piece of Victorian Ash.
Daryl.

User avatar
Timmah
Posts: 83
Joined: Sun May 21, 2006 8:12 pm
Location: Canberra, Australia

#10 Post by Timmah » Sun May 28, 2006 10:43 am

Cheers Guys.

I found a strait grained chunk of Vic ash which was lovely and cheap. The growth rings are almost parallel to the grain when you look at the end of the timber. One edge of the timber only has a small amount of runoff and the faces have no runoff. I'm hoping this is a good thing?

I have marked the outline of the bow on the face and made sure its all strait and even. I am now removing excess bulk material by making small saw cuts and using the chisel in the direction of the cut. This is removing nice controlled squares of wood. When i get the wood reduced enough I'll start using the Rasp and the file to finish up near the lines. The surform will finish the job.

As for the back/belly i am unsure on how to proceed. I need to carve a handle as my board is a good 30mm deep. Should i use the above technique or just use the surform?

Once again thanks for the advice.

User avatar
greybeard
Supporter
Supporter
Posts: 2992
Joined: Tue Feb 07, 2006 9:11 am
Location: Logan City QLD

#11 Post by greybeard » Sun May 28, 2006 6:12 pm

Hi Timmah,
Time to put the chisel away. Use your rasps, surform etc but not the chisel. Now is the time for the elbow grease. Best of luck,
Daryl.

User avatar
Timmah
Posts: 83
Joined: Sun May 21, 2006 8:12 pm
Location: Canberra, Australia

#12 Post by Timmah » Sun May 28, 2006 10:04 pm

Shaping is done. Took me all weekend... Start tillering next weekend.
Attachments
Untitled-1.jpg
Untitled-1.jpg (32.39 KiB) Viewed 3544 times
Untitled-2.jpg
Untitled-2.jpg (26.75 KiB) Viewed 3544 times

User avatar
Stickbow Hunter
Supporter
Supporter
Posts: 11637
Joined: Sat Jul 26, 2003 8:33 pm
Location: Maryborough Queensland

#13 Post by Stickbow Hunter » Sun May 28, 2006 10:18 pm

Lookin good so far. All the best with it Tim.

Jeff

User avatar
oliver
Posts: 89
Joined: Tue May 09, 2006 9:42 pm
Location: Hobart, Tas

#14 Post by oliver » Sun May 28, 2006 10:32 pm

Hey Timmah great thread It's great to see someone about as experienced as me havin a go at makin a bow.

I've never thought of floorboards for a bow before but mate if this works I will be knockin one together before you can say Howard Hill.

Where'd you get the plans ?

All the best mate. Keep us posted

Oliver
"Archery may not be the sport of kings. But it is definitely the KING OF SPORTS."-Howard Hill

User avatar
Timmah
Posts: 83
Joined: Sun May 21, 2006 8:12 pm
Location: Canberra, Australia

#15 Post by Timmah » Mon May 29, 2006 9:13 am

Oliver,

I found that some build-a-longs have really good bits and then bits that are not so clear.... so I'm following a few :)

The one i used for the layout is:
http://bowyersworkshop.com/auctionbow1.htm

The others are on George Tsoukalas's site:
http://mysite.verizon.net/georgeandjoni/archer.html

I'm also going off the info on this site and on the bowyers journal:
http://www.bowyersjournalboard.com/

Cheers.

User avatar
Timmah
Posts: 83
Joined: Sun May 21, 2006 8:12 pm
Location: Canberra, Australia

#16 Post by Timmah » Sat Jun 03, 2006 7:02 pm

OK again took me all day but she startin to bend! Id say at this stage its a 900lb bow though ;-)
Hopefully I'll get it on the tiller tree sometime tomorrow and get it bending nicely. I'll post some pics tomorrow night if i get some good results.

User avatar
kimall
Posts: 1426
Joined: Tue Jun 08, 2004 9:21 pm
Location: Toowoomba

Bending

#17 Post by kimall » Sat Jun 03, 2006 8:45 pm

Mate one thing I learned is dont put more weight on it than you intend to draw when finished.If you are working toward a 50 pound bow dont pull it more than that when tillering.I did this and it leads to string follow in my experience.
Cheers KIM

Glenn Newell

#18 Post by Glenn Newell » Sat Jun 03, 2006 9:03 pm

Timmah, good luck with your selfbow. If I were you mate I wouldn't ever pull you selfbow down too far above your intended target weight, if you want 60# don't pull it much past the 65# mark, you could damage your bow stave. When you get the bow on the tiller tree never leave it pulled down for more than a couple of seconds as this will only induce string follow and rob you bow of peformance. Pull your bow down on the tiller tree as if you are shooting it, when you finally get it down to full draw just hold it there for 2 seconds and then ease up, don't hold it there for excessive amounts of time. Always reverse to bow on the tiller tree just to make sure you are seeing limbs bend correctly.
A well tillered bow will bend the most down near the fadeouts of the handle and will gradually bend less towards the tips. A selfbow tillered this way will take a lot less string follow.
I have said this before but have been discredited for saying this on this site but if you are making a bow with equal length limbs then the top limb has to be stiffer by around 1/8th of an inch, if you are making a bow with a shorter bottom limb the and only then will the bottom limb be stiffer by around 1/8th...Glenn...

User avatar
Timmah
Posts: 83
Joined: Sun May 21, 2006 8:12 pm
Location: Canberra, Australia

#19 Post by Timmah » Sat Jun 03, 2006 9:25 pm

Thanks for the advice. I'll take note when i get back at it tomorrow. It also tells me that i need to reduce the wood near the fadeouts as the bow bends mostly mid limb at the moment.

Glenn Newell

#20 Post by Glenn Newell » Sun Jun 04, 2006 8:13 am

Timmah, another way of designing your limb section is to make the back and belly slightly rounded, I wouldn't make a rectangular limb section for a selfbow, I know that this design is held up as a good way to make a selfbow but it is actually a bad design idea. If you go for a slightly rounded back and belly and round off the edges as well, not leaving any square sections on the limb then you reduce the chances of chrysling on the belly, and you will have a much lighter mass to your limbs which will make your bow faster and will reduce string follow by a long way, you will never get as good a bow with the flat belly rectangular limb section, it's just not an efficient design.
The idea would be to make a couple of selfbows from the same timber, one with a rectangular limb and another with the rounded back and belly and see which one gives the best results. There is no limit what you can do with a piece of timber. Besides hunting I think that building selfbows is the best fun you can have in archery, don't be a slave to what you read in books, some of the best selfbows I have ever seen were made by a bloke at Kilkoy who had never read a book on how to make a selfbow, they were just what he had come up with...Glenn...

User avatar
Timmah
Posts: 83
Joined: Sun May 21, 2006 8:12 pm
Location: Canberra, Australia

#21 Post by Timmah » Sun Jun 04, 2006 3:04 pm

Im aiming for 50# @ 28". On the tiller tree with the long string im 50# (have not drawn it over 50) at 25". When is it time to move to the low brace? Am I able to use the same rope that i used for the long sting to test the low brace or should i get a real bowsting?

User avatar
greybeard
Supporter
Supporter
Posts: 2992
Joined: Tue Feb 07, 2006 9:11 am
Location: Logan City QLD

#22 Post by greybeard » Sun Jun 04, 2006 8:15 pm

Timmah,
It may be time to brace the bow with a string of the correct length. From previous experience I have found that a bow that appears to be correctly tillered on the tree changes it's characteristics once strung with the correct string. I think that the tiller string has a more gentle downwards force whereas with the bow string the force is back towards the handle. It is a little difficult to explain but I have seen bows that looked good on the tiller tree collapse when strung. With selfbows I have found that a brace height about 5 1/2 " works well.
Daryl.

Glenn Newell

#23 Post by Glenn Newell » Sun Jun 04, 2006 9:24 pm

As Daryl said, the bow may look different when strung with a proper string. I would be stringing the bow now with a low brace height. You can do final tillering with the braced, just take it easy and check it often. As Daryl I shoot selfbows with a 5 1/2" brace height also...Glenn...

Glenn Newell

#24 Post by Glenn Newell » Mon Jun 05, 2006 6:33 am

Here are some Australian hardwood selfbows Alan Jones of Kilcoy made. Grey Ironbark, Red Ironbark and I think Yellow Stringybark either that or Tallowwood. These bows are wide flatbows with rounded backs and bellys and very little string follow...Glenn...


Image

Paul
Posts: 203
Joined: Sat Oct 18, 2003 11:30 am
Location: Narangba QLD

#25 Post by Paul » Mon Jun 05, 2006 10:41 am

They are some interesting and great looking bows Glenn.

Do you know which one of his limb designs worked the best with the heavy Australian hardwoods?

Glenn Newell

#26 Post by Glenn Newell » Mon Jun 05, 2006 1:03 pm

Those bows were a lot wider than they needed tp be, they were a product of the overbuilt bow articles coming out from the States. All of the bows shot well with the ironbarks shooting the best. Those bows could have been made much narrower and a little deeper and I am sure they would have been a all round better bow, but thats where we were back then and ideas evolve. That's the beauty of selfbows they are very dynamic and there are no limits to what you can do with a piece of timber. Alan had so many different bows in his shed you would shoot yourself out just shooting all of his bows of different designs and timbers, nearly all of them Australian natives, and who said that Aussie timbers would only make a meidocre bow at best, that was the opinion of someof our so called top bowyers in Australia, just goes to show that some people will never know what they are talking about, no matter how many bows they build...Glenn...

User avatar
Stickbow Hunter
Supporter
Supporter
Posts: 11637
Joined: Sat Jul 26, 2003 8:33 pm
Location: Maryborough Queensland

#27 Post by Stickbow Hunter » Mon Jun 05, 2006 2:26 pm

I have said this before but have been discredited for saying this on this site but if you are making a bow with equal length limbs then the top limb has to be stiffer by around 1/8th of an inch, if you are making a bow with a shorter bottom limb the and only then will the bottom limb be stiffer by around 1/8th
G'day Glenn,

I do not understand this and in fact do not agree with what you are saying as it goes against proven bow making principals. Would you please explain your reasoning for advising people to build bows in the manner you have outlined above?

Thanks

Jeff

Glenn Newell

#28 Post by Glenn Newell » Mon Jun 05, 2006 7:57 pm

Jeff this does not go against proven bow making principiles at all. It's very simple, when you make a bow of equal length limbs the static centre of the bow should be the middle finger of your bow hand, when you draw the bow using split fingers your index finger is over two inches above centre. By doing this you have shortened the the string to the top limb and therefore you will be putting more pressure on the top limb, you have to stiffen the top limb so that both limb tips arrive at the same point at the same time. Failure to do this will induce extra string follow and hand shock. That's putting it simply. Anybody who has a good look at it can work this out for themselves, it's not hard. As I said to Timmah, make a couple of bows and see what happens...Glenn...

User avatar
Stickbow Hunter
Supporter
Supporter
Posts: 11637
Joined: Sat Jul 26, 2003 8:33 pm
Location: Maryborough Queensland

#29 Post by Stickbow Hunter » Mon Jun 05, 2006 8:10 pm

Glenn,

Thanks for that explanation and I understand what you are saying now, it is what is often termed negative tiller. However, because of the very reasons that you give I believe the top limb should be weaker not stronger, at least that is what I have found.

Jeff

Glenn Newell

#30 Post by Glenn Newell » Mon Jun 05, 2006 8:30 pm

Jeff negative tiller is very important when making selfbows, you can positive tiller an equal length limb fibregalss bow and get away with it but not with selfbows. An equal length limb has a static centre which should be the centre of your index finger of your bow hand and the dynamic centre is where the string is drawn from which is above centre which will automatically apply more stress on the top limb, so therefore the top limb must be stiffer to withstand the extra stress and just as important to balance the bows limbs.
The reason for a stiffer bottom limb on a shorter bottom limb bow is that that more stress is applied to the shorter limb when being drawn, the same reason the top limb must be stronger on an equal length limb bow, the top limb has more pressure applied to it when being drawn because the string is shorter to the top limb as to the bottom limb. All you have to do is make a few selfbows from the same stock timber, make the bows to the same dimensions and tiller one negative and the other positive and see what you think...Glenn...

Post Reply