Little steps

Where to source materials etc. Also the place to show off your new bow or quiver etc.... Making things belongs in Traditional Crafts.

Moderator: Moderators

Post Reply
Message
Author
User avatar
Muz1970
Posts: 259
Joined: Thu Feb 13, 2014 10:41 am
Contact:

Little steps

#1 Post by Muz1970 » Mon Jun 01, 2015 7:08 pm

Well I started this project of building myself my own hunting bows months ago. Between changing employment and catching up on jobs around home I haven't had much time to dedicate to it, let alone shoot a bow come to think of it. So this weekend I finished off the form, it took a bit of sanding to get it square and symmetrical. The hot box is all but finished, just need to line it. I've had it controlling up to 100 deg with a temporary piece of under floor foil with no dramas. Also need to sort out the air regulation to the hose while in the box.

So hopefully in the next couple of weeks I'll get to glue my first bow up. Maybe.......................
IMG_5027.JPG
IMG_5027.JPG (117.74 KiB) Viewed 10739 times
IMG_5037.JPG
IMG_5037.JPG (107.08 KiB) Viewed 10739 times
IMG_5024.JPG
IMG_5024.JPG (108.79 KiB) Viewed 10739 times
IMG_5032.JPG
IMG_5032.JPG (96.08 KiB) Viewed 10739 times

User avatar
UPTHETOP
Posts: 1187
Joined: Mon Jun 11, 2007 9:03 pm
Location: Dalby
Contact:

Re: Little steps

#2 Post by UPTHETOP » Mon Jun 01, 2015 7:20 pm

Well done Muz, you will never look back from the learning curve now. Don't forget to coat the from with something just In case the glue leaks onto it as when you try to remove it it''ll take pieces of the form with it.

Cant wait to see some sandgroper woods being used. All the best.

Cheers Wayno
Justastik Arrow Craft, Its all about the Wood.

User avatar
Gringa Bows
Posts: 6331
Joined: Thu Aug 30, 2007 7:09 pm
Location: Bundaberg QLD

Re: Little steps

#3 Post by Gringa Bows » Mon Jun 01, 2015 9:14 pm

Looks like your doing a top job Muz,i'm looking forward to see number one....enjoy the bow making trip mate.........

User avatar
Muz1970
Posts: 259
Joined: Thu Feb 13, 2014 10:41 am
Contact:

Re: Little steps

#4 Post by Muz1970 » Tue Jun 02, 2015 7:27 am

Thanks Wayne and Rod, I've put a few hours in to date just making the benches, hot box and form. Just had to start knocking up another bench for a feed in table, in preparation for making the laminations and veneers. I guess once everything is made and ready to go the bow making side wont be as slow.

Cheers Muz

User avatar
bigbob
Posts: 4098
Joined: Sat Jul 10, 2010 8:55 pm
Location: sunshine coast

Re: Little steps

#5 Post by bigbob » Tue Jun 02, 2015 8:34 am

muz if you apply the same effort to the actual bow as you obviously have with form and hotbox, you will have a great outcome . Welcome to the bowyers world!
nil illigitimo in desperandum carborundum
razorbows.com

User avatar
Muz1970
Posts: 259
Joined: Thu Feb 13, 2014 10:41 am
Contact:

Re: Little steps

#6 Post by Muz1970 » Sun Jun 21, 2015 6:51 pm

Well I'm a few steps closer. Redid the hot box with two new element heaters at $18ea and lined it also. Controls nicely and gets up to temp easily. Mounted a air regulator on the hot box and an isolation valve on the form. This is so I can transfer the form around while disconnected from the hose and remain at pressure. Varnished the form today and did a dummy run. Had to sand the riser block a far bit to get good lines. Was pretty happy with myself and thought I was good to start gluing up my first bow when I discovered a split in one of the tapered core laminations. For a while I thought about gluing it but have decided to make another set. So maybe next weekend.
20150621_160130.jpg
20150621_160130.jpg (60.28 KiB) Viewed 10622 times
20150621_160159.jpg
20150621_160159.jpg (90.38 KiB) Viewed 10622 times
20150621_155536.jpg
20150621_155536.jpg (94.65 KiB) Viewed 10622 times
20150621_155525.jpg
20150621_155525.jpg (73.53 KiB) Viewed 10622 times
20150621_160010.jpg
20150621_160010.jpg (80.83 KiB) Viewed 10622 times
20150621_155902.jpg
20150621_155902.jpg (39.11 KiB) Viewed 10622 times

User avatar
bigbob
Posts: 4098
Joined: Sat Jul 10, 2010 8:55 pm
Location: sunshine coast

Re: Little steps

#7 Post by bigbob » Sun Jun 21, 2015 6:58 pm

Liking what I'm seeing Muz, looks a lot like the deflex/reflex I make! Riser fit looks great! :clap:
nil illigitimo in desperandum carborundum
razorbows.com

User avatar
Muz1970
Posts: 259
Joined: Thu Feb 13, 2014 10:41 am
Contact:

Re: Little steps

#8 Post by Muz1970 » Sun Jun 21, 2015 7:16 pm

Cheers Bob, I searched the net and liked the Peregrine hybrid longbow by Cari-bow and based my design on that. Used a 1m metal ruler to get my curves and made it a bit longer for my 31" draw length.

Early days yet but enjoying the journey thus far.

Cheers Muz

User avatar
Flatliner
Posts: 449
Joined: Fri Apr 08, 2011 6:12 pm
Location: Gordonvale NTH QLD

Re: Little steps

#9 Post by Flatliner » Wed Jun 24, 2015 6:39 pm

Nice work on the form Muz and the heat box and bow bits for that mater.
Is that a piece of carbon I see in the lam stack?
And what are the timbers you are using?

Keep up the good work.

Cheers, Rob.
The shortest distance between two points is a FLATLINE
ImageEmail; robnicoll(at)bigpond(dot)com
www.flatlinebows.com.au

User avatar
Muz1970
Posts: 259
Joined: Thu Feb 13, 2014 10:41 am
Contact:

Re: Little steps

#10 Post by Muz1970 » Wed Jun 24, 2015 9:25 pm

Cheers Rob, yes there's a 20 thou carbon going in there under Jarrah venneers. The riser is a solid piece of Jam wood ( acacia acuminata ). I've used Vertical bamboo bench top laminations tapered to 3 thou for the core. Only using two cores as I'm trying to get around the 35-40#@31" with the carbon. Bit of a educated guess at this stage. I've also got a few local timbers to go on the front of the riser, on top of the glass, Mallabie, Banksia and Woody Pear.

Have cut and sanded new tapered laminations tonight so I'm ready for glue up Saturday morning.

User avatar
ron300wm
Posts: 101
Joined: Sun Nov 11, 2012 3:10 pm
Location: Gympie, Qld 4570

Re: Little steps

#11 Post by ron300wm » Wed Jun 24, 2015 10:42 pm

Keep us posted
:ugeek:

User avatar
The Ranger
Posts: 149
Joined: Thu Sep 19, 2013 3:05 pm
Location: Goulburn NSW
Contact:

Re: Little steps

#12 Post by The Ranger » Thu Jun 25, 2015 7:45 am

Muz, looking good mate. I was told once before that a strip of carbon in the bow will give it approximately 5lb of added weight.

Ranger
Don't practise until you get it right. Practise until you don't get it wrong. Ranger Bows.

User avatar
Muz1970
Posts: 259
Joined: Thu Feb 13, 2014 10:41 am
Contact:

Re: Little steps

#13 Post by Muz1970 » Thu Jun 25, 2015 9:56 pm

Had a bit of time tonight so I glued it up. Ended up chucking a parallel core in the mix as well. All was going well until I placed the riser block on top of the stack on the form and turned my back to apply glue to the next stage. The slippery bugger slid off and damaged the feathered fading edges on both sides. With no choice I finished gluing it up. Bit of a steep learning curve. I had actually bought a clamp to hold it down while doing the rest of the gluing. Not happy :angry-screaming: Live and Learn I guess. Or cry into my beer. :angry-screaming:

I was happy with my guestimate of the amount of glue I mixed. Using 111grams of each. Not sure If everyone applies glue to both sides of each piece but I found that to be the worst part of the glue up stage. Taking me a little over an hour to glue up.

Anyway I better set my alarm for 1am to go turn the hot box off.
20150625_192117.jpg
20150625_192117.jpg (84.3 KiB) Viewed 10460 times
20150625_192059.jpg
20150625_192059.jpg (105.89 KiB) Viewed 10460 times
20150625_192050.jpg
20150625_192050.jpg (82.85 KiB) Viewed 10460 times

hunterguy1991
Posts: 859
Joined: Mon Jul 09, 2012 10:18 am
Location: Woodford Queensland

Re: Little steps

#14 Post by hunterguy1991 » Fri Jun 26, 2015 7:30 am

Cant wait to see how this comes out mate!! looking good so far tho.

User avatar
Gringa Bows
Posts: 6331
Joined: Thu Aug 30, 2007 7:09 pm
Location: Bundaberg QLD

Re: Little steps

#15 Post by Gringa Bows » Fri Jun 26, 2015 11:20 am

I had one slip the riser once too mate,lost my cool and through the lot in the bin,you doin a great job ,keep it up

User avatar
bigbob
Posts: 4098
Joined: Sat Jul 10, 2010 8:55 pm
Location: sunshine coast

Re: Little steps

#16 Post by bigbob » Fri Jun 26, 2015 3:00 pm

those thin fades are always a worry! Re the glue on both sides, I find that its absolutely essential to do both sides. Only doing one side would really increase the potential for dry spots or starvation. stay with both sides Muz!
nil illigitimo in desperandum carborundum
razorbows.com

User avatar
Muz1970
Posts: 259
Joined: Thu Feb 13, 2014 10:41 am
Contact:

Re: Little steps

#17 Post by Muz1970 » Sat Jun 27, 2015 5:37 pm

I shaped the bow today, marked it all out so that it ran from 31mm at the fades out to 15mm at the tips. After a bit of sanding I was close to my marks so I made my temporary nocks at 68" and tired stringing it. I could only just manage it using both hands and then my knee as well. My 80+lb bow I string easily with one hand using the stringer.
It was then that I measured the stack at the fade and compared it to my retired 83# carbon bow. There pretty much the same, Except this is way heavier. I shouldn't have added that extra core lamination, it just looked to thin at the time. :angry-jumpinganger: I reduced the width of the limbs tapering down from 26mm at the fades and maintained 15mm at the tips. Tried stringing it again, but it rolls the string out of the temporary grooves. I think the last 1/3 of the limb is to soft and it twists when strung. Need to work out what's going on.

The last time I tried to string it the string rolled out and the fiberglass splintered on the limb. I have now brocken my saunders stringer as well....Its way to heavy so I have proceeded treating it as a practice run
.
Lots of lessons learnt.

Glued on the Banksia and Western Woody Pear onto the front of the riser then shaped it.
20150627_142436.jpg
20150627_142436.jpg (36.6 KiB) Viewed 10409 times
20150627_143217.jpg
20150627_143217.jpg (41.07 KiB) Viewed 10409 times
20150627_143000.jpg
20150627_143000.jpg (66.92 KiB) Viewed 10409 times

User avatar
Muz1970
Posts: 259
Joined: Thu Feb 13, 2014 10:41 am
Contact:

Re: Little steps

#18 Post by Muz1970 » Sat Jun 27, 2015 6:20 pm

I think my problem is due to the amount of reflex in my design. I should be treating it more like a recurve in the limb design with thinner wider laminations and only tapering towards the tips.Hence why it has taken on so much weight. Maybe.....???????
20150627_143041.jpg
20150627_143041.jpg (53.68 KiB) Viewed 10405 times
Muz

User avatar
bigbob
Posts: 4098
Joined: Sat Jul 10, 2010 8:55 pm
Location: sunshine coast

Re: Little steps

#19 Post by bigbob » Sat Jun 27, 2015 7:11 pm

Not sure what weight you were aiming for Muz but with a similar design my d/r stack for a 55# bow was 3 lams of .080 x .001 taper and a parallel of .075 for a total wood stack of .245 using .040 glass. Hope this helps.
nil illigitimo in desperandum carborundum
razorbows.com

User avatar
greybeard
Supporter
Supporter
Posts: 2992
Joined: Tue Feb 07, 2006 9:11 am
Location: Logan City QLD

Re: Little steps

#20 Post by greybeard » Sat Jun 27, 2015 9:38 pm

Muz1970 wrote:..... by Cari-bow and based my design on that. Used a 1m metal ruler to get my curves and made it a bit longer for my 31" draw length.....
When you modified the design where did you add the extra length i.e. at the fades, mid limb or the tips and by how much?
Muz1970 wrote:.....Tried stringing it again, but it rolls the string out of the temporary grooves. I think the last 1/3 of the limb is to soft and it twists when strung. Need to work out what's going on.....
Once you start changing the geometry of an existing design you are opening a tin of worms.

Daryl.
"And you must not stick for a groat or twelvepence more than another man would give, if it be a good bow.
For a good bow twice paid for, is better than an ill bow once broken.
[Ascham]

“If a cluttered desk is a sign of a cluttered mind, of what, then, is an empty desk a sign?” [Einstein]

I am old enough to make my own decisions....Just not young enough to remember what I decided!....

User avatar
Muz1970
Posts: 259
Joined: Thu Feb 13, 2014 10:41 am
Contact:

Re: Little steps

#21 Post by Muz1970 » Sun Jun 28, 2015 11:01 am

Thanks Bob, I used 30 thou glass with the 20 thou carbon on the back and 50 thou glass glass on the belly. I had core laminations of 1 x 94 thou tapered at 003 thou, 1 parallel 94 thou and 1 x 74 thou tapered at 003 thou on the belly. The 74 was made to replace the lams with the split in it and I went a bit to far with the sanding. It was intended to be made as the others. The parallel was a last minute decision. I would have been happy with anything under 70lb.
So my total wood stack was 262 thou plus the carbon(55), = 317 thou. (I had read on the Pirates web that 20 thou of carbon was equivalent to 55 thou of core lamination.)
So I had 30 glass, 20 veneer, 20 (55) carbon, 94,94,74, 20 veneer, 50 glass

You said you had a total wood stack of 245 thou, is that measured at the fade?
80 x 3 = 240 + 75 = 315 thou


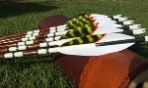
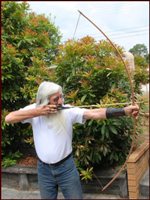
Hey Greybeard. I simply copied the shape of the bow I liked from a photo, following similar lines. It was a 62" bow though and I made mine longer at 68". So I guess I've just got to nut it out next time. Early days and like I said a learning curve.
Unfortunately when I glued mine up my back glass moved some 6mm from the rest of the stack so I was only just able to cut the bow shape out. Another lesson learnt as I never used tape to hold it all in place as I was struggling a bit with sticky gloves and was worried about the glue starting to go off. Next time I'll get the misses to help at that stage.

So the next attempt I'll only have two thin core laminations with a 001 thou taper, leave the carbon out and use 2 x 30 thou glass. Start with wide limbs and work my way down while exercising them. Nothing like diving in the deep end.... :D

Chees Muz

User avatar
Muz1970
Posts: 259
Joined: Thu Feb 13, 2014 10:41 am
Contact:

Re: Little steps

#22 Post by Muz1970 » Sun Jun 28, 2015 4:57 pm

Starting thinking about the twist in the limbs and how lightly I could move them. So I clamped several bows in the vice and measured the sideways movement verses weight. Came up with a rough figure of 10lbs of weight for 30mm of movement at the string groove. So I used these figures and worked my way down from the tips. At 60" it was close, I decided on a slightly stiffer measurement at 58".
20150628_141701.jpg
20150628_141701.jpg (107.3 KiB) Viewed 10374 times
I shorten a string and was able to string it. But only just.......
braced.jpg
braced.jpg (40.56 KiB) Viewed 10374 times
Quickly made a tiller board, and took some measurements. 58lb@18", 69lb@20", 78lb@22", 90lb@24", I gave up measuring but did exercise it up to 30". It was bloody heavy at 30". Guessing around 120lb by the above measurements.

Bow drawn to 28"
28.jpg
28.jpg (48.04 KiB) Viewed 10374 times
Bow drawn at 30"
30.jpg
30.jpg (39.44 KiB) Viewed 10374 times

User avatar
ron300wm
Posts: 101
Joined: Sun Nov 11, 2012 3:10 pm
Location: Gympie, Qld 4570

Re: Little steps

#23 Post by ron300wm » Sun Jun 28, 2015 5:08 pm

Should bust through a Buffalo :confusion-scratchheadyellow:

User avatar
bigbob
Posts: 4098
Joined: Sat Jul 10, 2010 8:55 pm
Location: sunshine coast

Re: Little steps

#24 Post by bigbob » Sun Jun 28, 2015 5:39 pm

,030 glass is really to light too for that sort of poundage.Adding carbon brings in other variables as wel Will check my figures again re the stack thickness and put it up later, Muz.
nil illigitimo in desperandum carborundum
razorbows.com

User avatar
rodlonq
Posts: 2096
Joined: Wed May 06, 2009 3:02 pm
Location: Ingham NQ

Re: Little steps

#25 Post by rodlonq » Wed Jul 22, 2015 12:21 pm

Muz1970 wrote:I think my problem is due to the amount of reflex in my design. I should be treating it more like a recurve in the limb design with thinner wider laminations and only tapering towards the tips.Hence why it has taken on so much weight. Maybe.....???????

Muz
I think you have hit the nail on the head there Muz. The design looks great, I like it. Looking forward to seeing how it goes with more of a flatbow style about it.

I also think bows like that can use quite a bit of taper to make sure the tip is working and storing energy rather than just being a stiff lever. I use 4 x 0.0015"/" tapers in my D/R bow and have no problems with string angle at longer draw lengths.

Cheers.... Rod

User avatar
Muz1970
Posts: 259
Joined: Thu Feb 13, 2014 10:41 am
Contact:

Re: Little steps

#26 Post by Muz1970 » Wed Jul 22, 2015 8:23 pm

Cheers Rod. Was a lot happier with my second attempt. Have started making Number #3. and will be keeping with the thinner limbs and yes a fare bit of taper to get the limbs to flex.

Then I'll need to order more glass as I'll be out. Bugga...

User avatar
Flatliner
Posts: 449
Joined: Fri Apr 08, 2011 6:12 pm
Location: Gordonvale NTH QLD

Re: Little steps

#27 Post by Flatliner » Thu Jul 23, 2015 12:01 pm

Muz1970 wrote:Unfortunately when I glued mine up my back glass moved some 6mm from the rest of the stack so I was only just able to cut the bow shape out. Another lesson learnt as I never used tape to hold it all in place as I was struggling a bit with sticky gloves and was worried about the glue starting to go off. Next time I'll get the misses to help at that stage.
I got over that scenario pretty quick too Muz. This is how I solved it, I fixed small aluminium lugs to the sides of all my forms to hold the laminations in place (best positioned when the bow is assembled in the form as a dry run). They are coated with clear packing tape as a bond breaker (as is the form it self) before being attached. The ones in the middle of the form also include the fades of the riser which help to avoid little accidents such as your earlier misfortune.
Note- you still have to put a layer of glad wrap over the form before lay up.
SDC13919.JPG
SDC13919.JPG (200.28 KiB) Viewed 10245 times
SDC13918.JPG
SDC13918.JPG (198.44 KiB) Viewed 10245 times
Going great guns Muz.
Remember the best lessons are learned the hard way ;) .

Cheers,
Rob.
The shortest distance between two points is a FLATLINE
ImageEmail; robnicoll(at)bigpond(dot)com
www.flatlinebows.com.au

User avatar
rodlonq
Posts: 2096
Joined: Wed May 06, 2009 3:02 pm
Location: Ingham NQ

Re: Little steps

#28 Post by rodlonq » Thu Jul 23, 2015 5:54 pm

Nice Rob, is that your Raptor form?

User avatar
Muz1970
Posts: 259
Joined: Thu Feb 13, 2014 10:41 am
Contact:

Re: Little steps

#29 Post by Muz1970 » Thu Jul 23, 2015 8:41 pm

Cheers for the tip Rob. Definitely right about lessons learnt the hard way. As this is my first ever attempt at any sort of serious wood working its a steep learning curve but its very enjoyable.

Cheers Mate

User avatar
Flatliner
Posts: 449
Joined: Fri Apr 08, 2011 6:12 pm
Location: Gordonvale NTH QLD

Re: Little steps

#30 Post by Flatliner » Thu Jul 23, 2015 11:39 pm

rodlonq wrote:Nice Rob, is that your Raptor form?
No Rod, believe it or not it's a reflex deflex form :shhh: .
I'm teaching a young fella (very talented self-bow maker) how to make composite bows and he wanted to do a R/D and the first one has come out quite nice though a little heavier than intended.
I'll leave it up to him to post about it, he is on here.

Muz maate,, ya wouldn't do it if ya weren't enjoying it.
The shortest distance between two points is a FLATLINE
ImageEmail; robnicoll(at)bigpond(dot)com
www.flatlinebows.com.au

Post Reply