knife build along

Blades. Knife-making, Flintknapping, sharpening broadheads, etc. A showcase for the talents of Cutlery and Artillery Artisans, and a place to sell and source wares, as well as materials, vendors etc.

Moderator: Moderators

Post Reply
Message
Author
User avatar
otis.drum
Posts: 972
Joined: Wed Jan 28, 2009 5:30 am
Location: cape york

knife build along

#1 Post by otis.drum » Sun May 23, 2010 7:50 pm

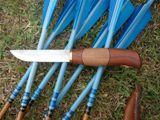
had a bad back this week so have been off work, moaping around the house feeling sorry for myself, and needing a little project that didn't require too much physical effort. So yesterday i set about making a bit of a skinning knife.

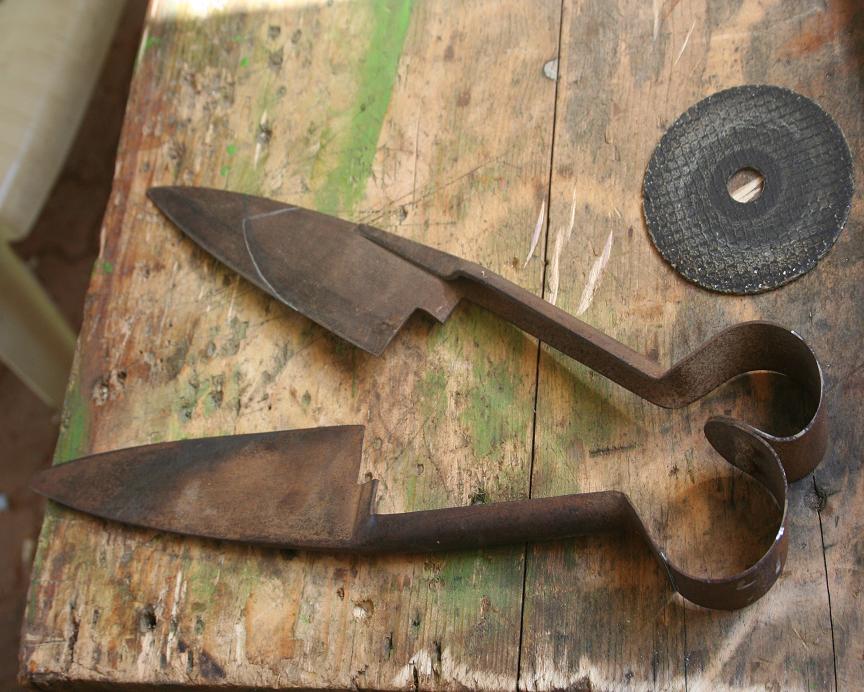
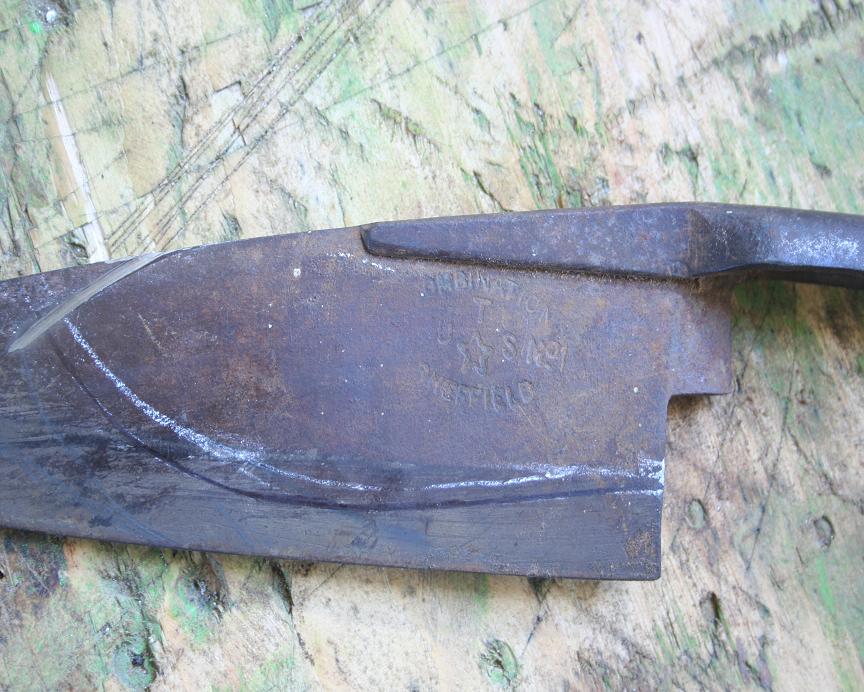
i was talking to my father inlaw a few months back and got onto making blades. i told him i was always looking for good steel to make knives and that if he came across any old tools or toolsteel to grab them for me. at that he put down his beer, walked over to the wall of his shed a pulled out from between the corregated iron and hardwood shed frame, an old pair, of what looked to be well used hand shears.
101.JPG
101.JPG (115.82 KiB) Viewed 2947 times
after sitting them on a shelf and threatening to do something with them for a few months i finally had the opportunity. i had drawn on a few shapes and designs over the months but hadn't set my mind on a final design.

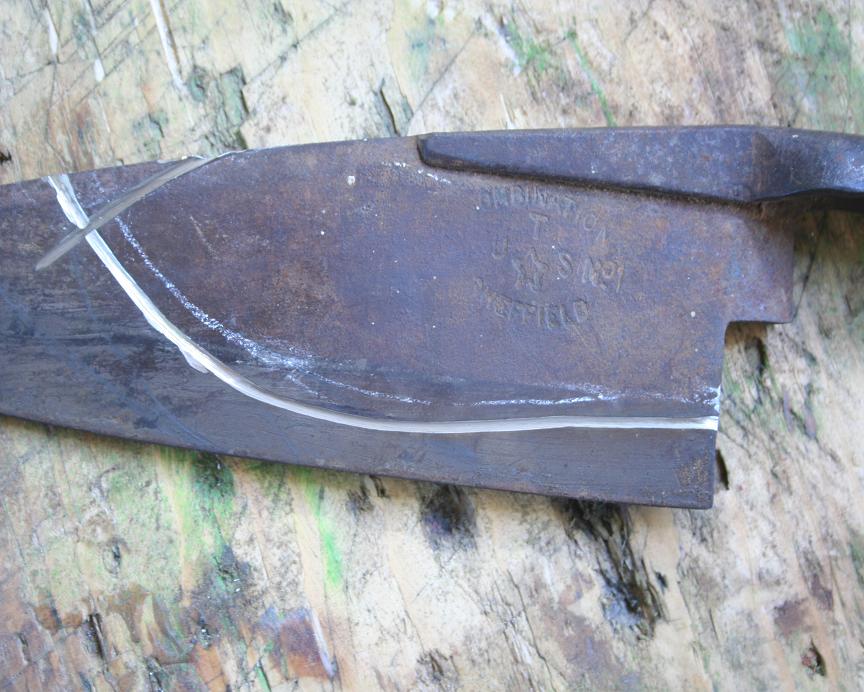
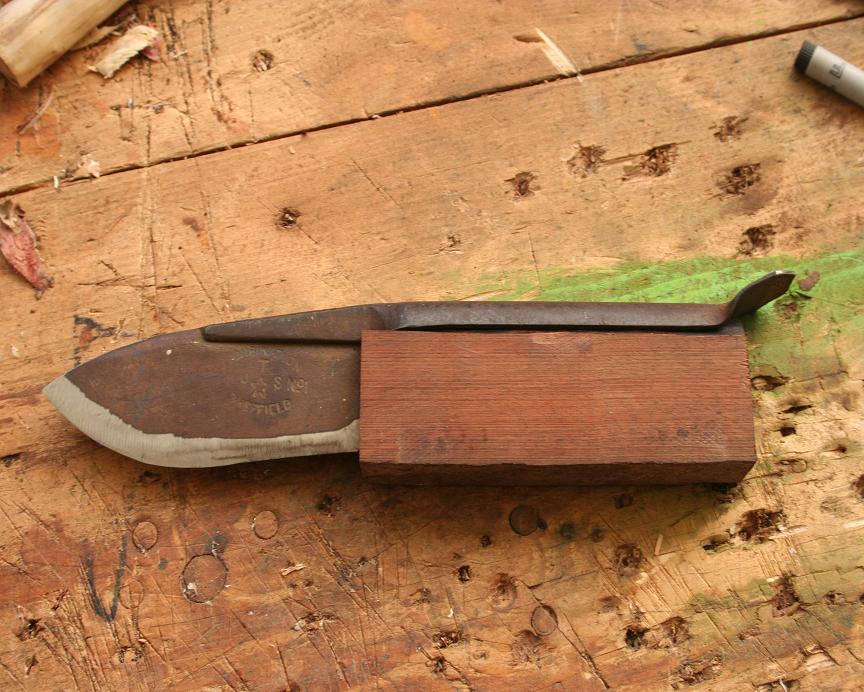
i cut one side of the shear off, and finalised a shape i like. i love skinners for some reason and thats the shape i ended up going with.
102.JPG
102.JPG (101.76 KiB) Viewed 2947 times
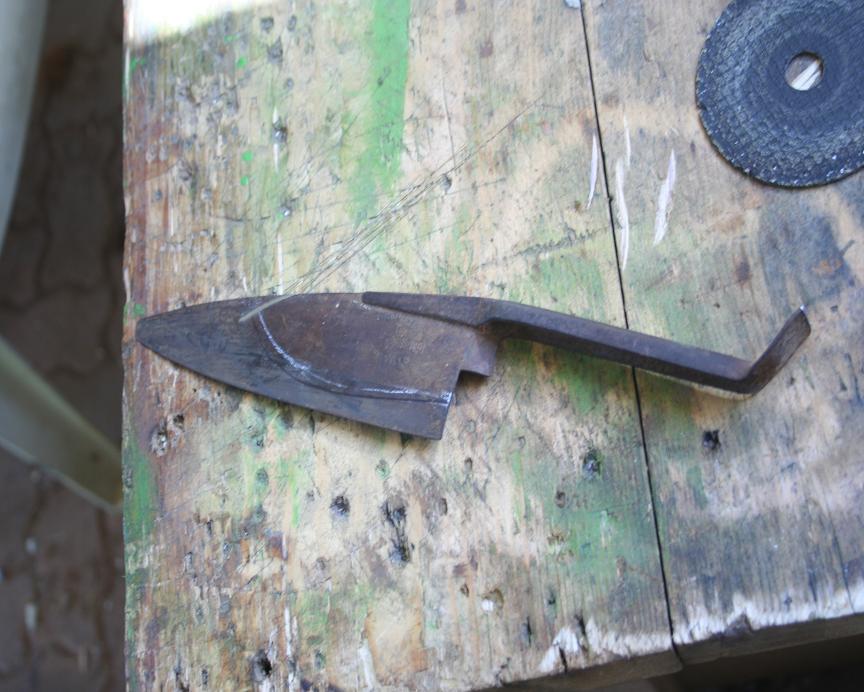
taking my 4" grinder and a 1mm cutting disc i carefully and softly followed my blade outline, cutting only a shallow groove in the surface of the blade. the idea being to make a shallow channel to follow with future runs with the grinder, but not overheating the metal too much.
103.JPG
103.JPG (124.14 KiB) Viewed 2947 times
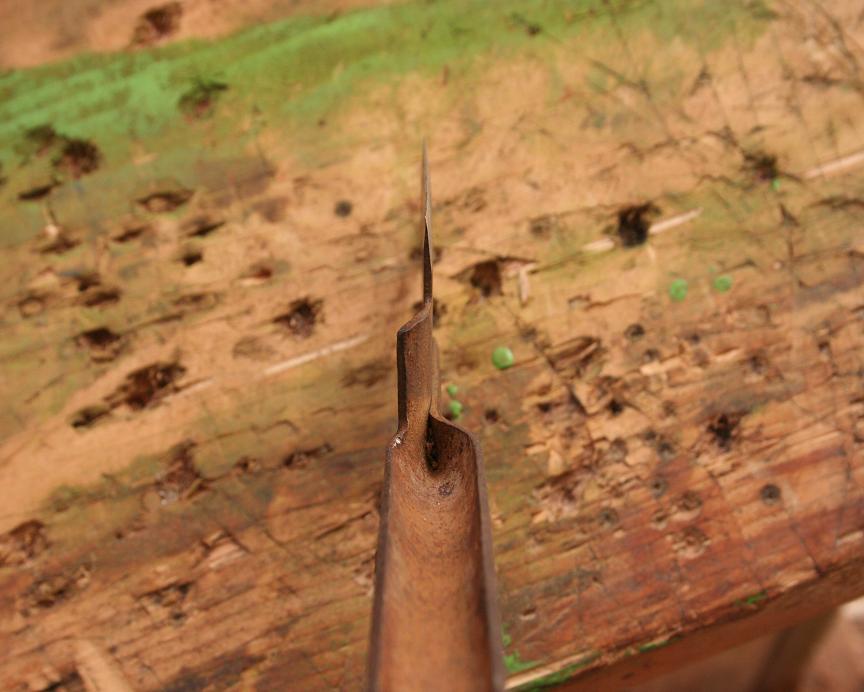
now i continue to follow the groove with the grinder, doing one pass at a time, then letting it cool for a couple of minutes.
104.JPG
104.JPG (112.52 KiB) Viewed 2947 times
the previous is a times taking step so it's a good opportunity to find a piece of wood and start looking and thinking of the handle design.

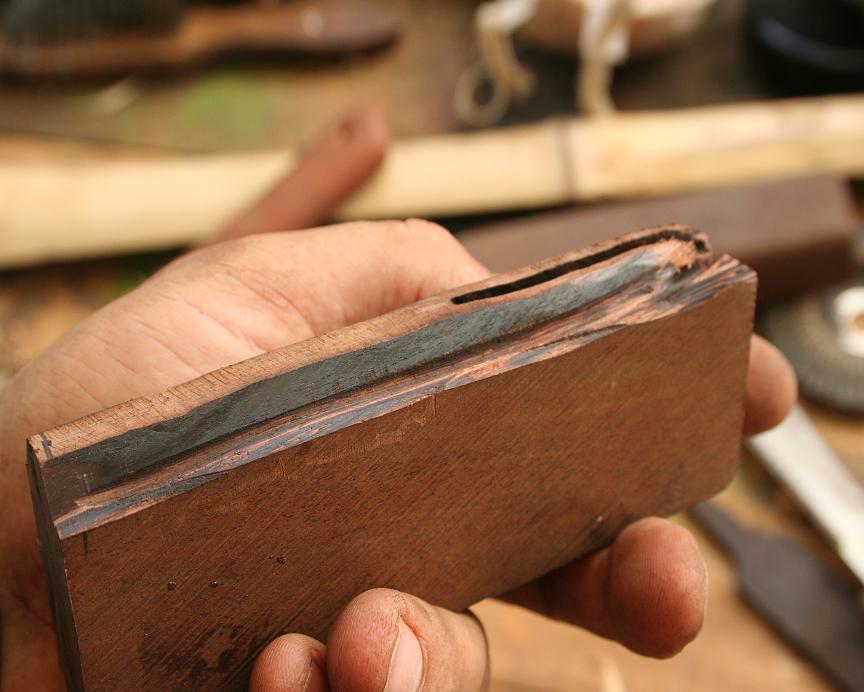
the blades of the shears are slightly concaved on one side and have a slight bend in them running down the blade. a little carefull work with the calibrated knockometer and it came in pretty straight. the other problem i was faced with was how to attach the wood for the handle to the concaved metal handle of the shears. this was the biggest downfall of this piece.
105.JPG
105.JPG (80.7 KiB) Viewed 2947 times
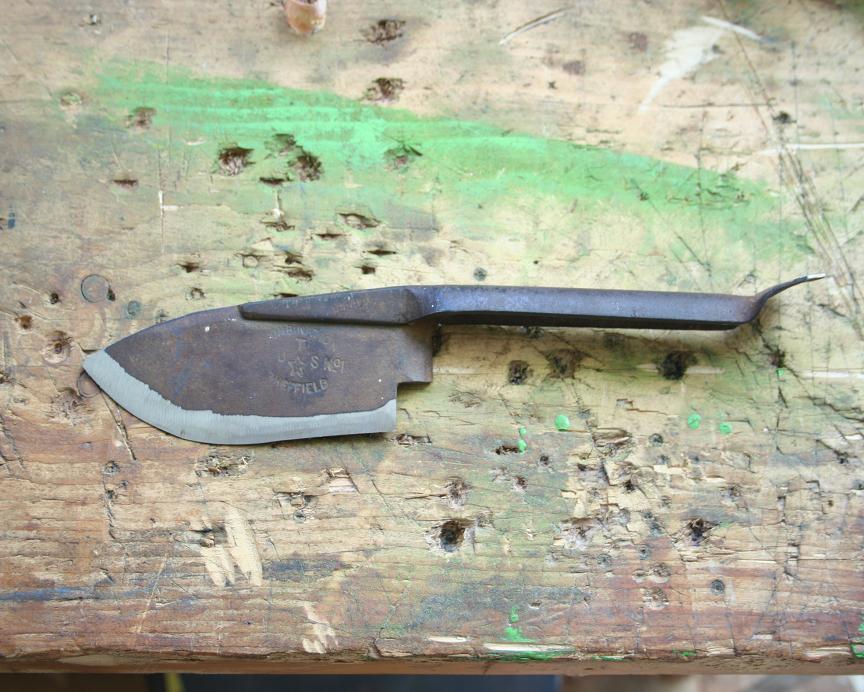
after a slow grinding session the following fell from the original shape.
106.JPG
106.JPG (120.32 KiB) Viewed 2947 times
i chose a piece of wattle (of some kind) for the handle piece.
107.JPG
107.JPG (128.73 KiB) Viewed 2947 times
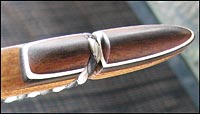
now i had to carve the wood to fit up inside the concaved metal handle. i started with a very roughed out shape, and slowly worked it to fit better and better. i ran the grinder down the centre of the blade end to fit a tab of metal off the blade.
108.JPG
108.JPG (79.03 KiB) Viewed 2947 times
Last edited by otis.drum on Tue Jul 02, 2013 6:44 pm, edited 2 times in total.
...otis...

User avatar
woodie
Posts: 686
Joined: Sun May 06, 2007 9:10 pm
Location: hunter valley, NSW

Re: little blade-a-long

#2 Post by woodie » Sun May 23, 2010 8:10 pm

Looking good is should be a good little knife.
Ron
may your arrows fly straight and true and your limbs return.

User avatar
otis.drum
Posts: 972
Joined: Wed Jan 28, 2009 5:30 am
Location: cape york

Re: little blade-a-long

#3 Post by otis.drum » Sun May 23, 2010 8:10 pm

i planned to screww the metal handle to the wood, and tried to counter sink the holes to accepts screw heads as best i could. this is an ugly way of doing things but the way i did it none the less.
110.JPG
110.JPG (61.22 KiB) Viewed 2947 times
apart from pinning and screwing i decided to glue the handle on also, as one of the three screws was not going to have much purchase on the wood. instead it would be drilling into two part epoxy, so i drilled out and roughed up an area around where the screw would go to give the glue something to hold to.
109.JPG
109.JPG (66.93 KiB) Viewed 2947 times
with a roughed out shape to go inside the metal handle i needed to know where to remove wood from next to allow for a better fit. i rubbed a small amount of sump oil on the inside of the metal handle, so that when i put the wood in place the high spots would get black oil on them and i would know where to take wood off.
113.JPG
113.JPG (110.46 KiB) Viewed 2947 times
112.JPG
112.JPG (60.48 KiB) Viewed 2947 times
i did this for a couple of hours, until more and more areas where touching the oily inside of the metal handle. i then roughed out the shape of the handle, and continued to fit the handles together and remove the high wood.
117.JPG
117.JPG (129.16 KiB) Viewed 2947 times
Last edited by otis.drum on Tue Jul 02, 2013 6:36 pm, edited 1 time in total.
...otis...

User avatar
otis.drum
Posts: 972
Joined: Wed Jan 28, 2009 5:30 am
Location: cape york

Re: little blade-a-long

#4 Post by otis.drum » Sun May 23, 2010 8:28 pm

once i was happy with the fit i screwed the two pieces in place and concentrated on shaping the handle closer to the finished shape.
119.JPG
119.JPG (96.99 KiB) Viewed 2947 times

using a file and flapper disc on the 4" i got the shape close to where i wanted it. i took a coulpe or goes, taking the handles apart and putting them back on again, marking with a pen, removing wood here and there until i was happy wi was getting close.
118.JPG
118.JPG (110.22 KiB) Viewed 2947 times

now a lot of sanding, wiping with a wet rag, letting dry, sanding, wiping, sanding, wiping etc etc, until the wood had a fine finish. the wattle was light and pourus but came up nicely. i finished it with a couple of coats of machine oil and a little sit in the sun.
120.JPG
120.JPG (84.15 KiB) Viewed 2947 times

i then polished up the metal with a wire brush attachment in the drill, and gave the cutting edges a bit of a closer grind. again this is done slowly with ample gaps between passes to allow the metal to cool. i then sat the two pieces together ready for a dress rehersal.
122.JPG
122.JPG (150.55 KiB) Viewed 2947 times

the finished product is 260mm long from tip to tip. the blade is 110mm long, about 1.5mm thick and 42mm deep. the handle is 120mm long, 18mm wide and about 30mm deep.
123.JPG
123.JPG (83.91 KiB) Viewed 2947 times

i gave it a good course and fine stone, ceramic and steel, and a practise run up my arm... seems to be working.
124.JPG
124.JPG (98.42 KiB) Viewed 2947 times
Last edited by otis.drum on Tue Jul 02, 2013 6:40 pm, edited 1 time in total.
...otis...

User avatar
blu-dog
Posts: 718
Joined: Thu Sep 18, 2008 9:04 pm
Location: Bundaberg

Re: little blade-a-long

#5 Post by blu-dog » Sun May 23, 2010 8:47 pm

functional...rustic looking and shaving sharp!

I like it...well done Otis!
The best trophies I can hope to acquire as a husband, father, friend or hunter are MEMORIES!
They will travel with me wherever life's path leads...

niss
Posts: 4
Joined: Sun Nov 09, 2008 6:44 pm

Re: little blade-a-long

#6 Post by niss » Sun May 23, 2010 9:23 pm

very nice :D

User avatar
Stickbow Hunter
Supporter
Supporter
Posts: 11637
Joined: Sat Jul 26, 2003 8:33 pm
Location: Maryborough Queensland

Re: little blade-a-long

#7 Post by Stickbow Hunter » Mon May 24, 2010 12:58 pm

Well thought out mate. :D

Jeff

User avatar
Gringa Bows
Posts: 6331
Joined: Thu Aug 30, 2007 7:09 pm
Location: Bundaberg QLD

Re: little blade-a-long

#8 Post by Gringa Bows » Sun May 30, 2010 9:22 am

Ay Otis,i got hold of a set of those shears this morning,so i'll be following your build along and hopefully make a knife that looks a bit like yours :wink:

User avatar
otis.drum
Posts: 972
Joined: Wed Jan 28, 2009 5:30 am
Location: cape york

Re: little blade-a-long

#9 Post by otis.drum » Sun May 30, 2010 11:49 am

good good, look forward to seeing it. i made another and a sheath for each over my days off so i'll put some pics up of the lot of them soon.

what wood are you going to use for your handle?? what blade shape are you thinking of??
Last edited by otis.drum on Sun May 30, 2010 8:19 pm, edited 1 time in total.
...otis...

User avatar
Gringa Bows
Posts: 6331
Joined: Thu Aug 30, 2007 7:09 pm
Location: Bundaberg QLD

Re: little blade-a-long

#10 Post by Gringa Bows » Sun May 30, 2010 11:55 am

i was thinking of using either osage or maybe gidgee i think the dark gidgee would look the best

User avatar
excelpoint
Posts: 702
Joined: Tue Apr 15, 2008 3:20 pm
Location: Melton, Victoria

Re: little blade-a-long

#11 Post by excelpoint » Sun May 30, 2010 12:24 pm

Nice work Otis. I like that.

User avatar
otis.drum
Posts: 972
Joined: Wed Jan 28, 2009 5:30 am
Location: cape york

Re: little blade-a-long

#12 Post by otis.drum » Sun May 30, 2010 1:45 pm

yeah the gidgee would look nice.
...otis...

User avatar
Stephen Georgiou
Posts: 429
Joined: Mon Mar 31, 2008 5:54 am
Location: Melbourne

Re: little blade-a-long

#13 Post by Stephen Georgiou » Mon May 31, 2010 10:15 am

rough as a bears ****!

Just love it! :D

Post Reply