Gilnockie's Linen Thread Source

Where to source materials etc. Also the place to show off your new bow or quiver etc.... Making things belongs in Traditional Crafts.

Moderator: Moderators

Message
Author
User avatar
Lou
Posts: 442
Joined: Sun Jul 11, 2004 1:00 am
Location: Melbourne, Australia

#31 Post by Lou » Wed Sep 29, 2004 8:45 pm

Erron,

Yeah, I shall sure post the picture if the dyeing comes up fine :lol: !

Norman,

I don't like the idea of a piece of string hanging from the end of the bow, so the timber hitch is ditched. I will have the second loop. I recon I can do the second loop at least 2 ways (possibly four if the variations are counted).

How did you do you make your string, did you have the loops as separate pieces or you just bent the string over at each end and worked the tapered ends back into the string by reverse twisting? Also, when doing the second loop, did you reverse twist the plies (bundles) of the main length of string before or after completing the second loop?

I looked at leatherwall, there are some good posts there.

Lou

User avatar
gilnockie
Posts: 603
Joined: Wed Sep 24, 2003 7:34 pm
Location: Hobart Tas

#32 Post by gilnockie » Thu Sep 30, 2004 8:27 pm

Lou

If you have not done this before, I suggest that you go to Spotlight and buy a couple of reels of the heaviest thread they sell and practice making strings with the thread. If you don't you will probably waste the linen I sent to you.

Here is a link to the site which is supposed to be THE site on Flemish Twist strings:

http://www2.pcom.net/jthutten/jth/doc/flemish.htm

Go to General Instructions and read points 4 and 8 very carefully. They say it all, except:

Reverse twist the two skeins about 40 times BEFORE you start the second loop.

This will prevent the skeins from twisting around each other. Apparently the end result should be all threads lying straight and un-twisted, as in a continuous loop string. Then you twist it to adjust the brace height. One of the two strings I made last night ended up like this ( it was just too short by about 6"). The second string was closer to the correct length but I did not reverse twist the skeins before I twisted in the second loop. Tthe skeins twisted individually and were simultaneously twisted around each other.

If this sounds confusing, it is.

Good luck
Norman

Draw, anchor, loose.

User avatar
gilnockie
Posts: 603
Joined: Wed Sep 24, 2003 7:34 pm
Location: Hobart Tas

#33 Post by gilnockie » Thu Sep 30, 2004 8:38 pm

Erron

Did I read somewhere that you wanted some samples? If so, send me your snail mail address and I will send you some.

Lou,

If you want a cone, send me a cheque for $45 and tell me which one you want.
Norman

Draw, anchor, loose.

User avatar
erron
Posts: 3299
Joined: Wed Jul 23, 2003 10:33 am

#34 Post by erron » Thu Sep 30, 2004 8:44 pm

You got it Norman, thanks!

Erron

User avatar
gilnockie
Posts: 603
Joined: Wed Sep 24, 2003 7:34 pm
Location: Hobart Tas

#35 Post by gilnockie » Thu Sep 30, 2004 9:27 pm

Erron

I will post the samples tomorrow.
Norman

Draw, anchor, loose.

User avatar
Lou
Posts: 442
Joined: Sun Jul 11, 2004 1:00 am
Location: Melbourne, Australia

#36 Post by Lou » Thu Sep 30, 2004 10:46 pm

Norman,

I will send the cheque tomorrow or at latest on Monday. Please get me a cone of No 18 and thanks for your help and effort :) .

I just made a little Flemish string out of dacron, with no jig. Took me about one hour while watching TV and talking to my wife. I did not bother removing the chuff from the ends because it is only a demo, or call it a warm-up and it is not log enough for real anyway. I misjudged the number of idle twist in the body so the plies are a little overtwisted but should not be a problem with full length string. I made only two ply string not to save on time and material.

It seems like the linen is not going to be wasted. I dyed 1/3 yesterday in Indian tea and got some nice colour (and beautiful Darjeeling tea smell) on it :D . I will dye the second third tonight in black to have it ready for weekend. I will post the pic when the string is ready.

I have seen earlier the site you posted. The info in the site is good but I also found a lot of partial, unclear and misleading info on the Web as well. As they say, the confusion comes because it is an easy to do but difficult to explain thing.

You haven’t told me how you made your string, I presume by using the method described on the site you posted.


Lou
Attachments
string.jpg
string.jpg (151.37 KiB) Viewed 4231 times

User avatar
gilnockie
Posts: 603
Joined: Wed Sep 24, 2003 7:34 pm
Location: Hobart Tas

#37 Post by gilnockie » Fri Oct 01, 2004 7:52 pm

Erron

I sent the samples today.

Lou

I think I made mine as you have made yours. One of mine has the skeins twisted individually, as does yours. You can overcome this, if you wish, by twisting the skeins in the oppiste direction to that which you will twist them, when you twist the loops. In other words, twisting the loops will result in the body of the string lying straight.

This is what I did with the second one.
Norman

Draw, anchor, loose.

User avatar
Lou
Posts: 442
Joined: Sun Jul 11, 2004 1:00 am
Location: Melbourne, Australia

#38 Post by Lou » Fri Oct 01, 2004 11:24 pm

Norman,

There is more than one way to do a Flemish string. Some people on the web are even talking about “braiding ‘em like pony tail”.

All,

I made another double loop string tonight from the material I got undoing the string from yesterday, but in a quite different way that I have not seen done before. But maybe someone else out there is actually making the strings this way, if so please let me know or I’ll claim the patent rights. I prefer this way over the conventional way because the loop is completely symmetrically twisted (getting the idea?) rather than made by bending the “tail” backwards and twisting it with the body of the string.

It goes like this:

Step 1. For a two ply string, instead of sticking the two plies together parallel as in a conventional way, you actually start by overlapping the two tails of each ply with the plies going in opposite directions. If you pinch the plies at the middle of the overlap this is where the middle of the loop is going to be and from this point you twist half of the loop length in each direction. Picture 1 shows this almost done.

Step 2. Bend the twisted part in the middle and join at the point where the base of the loop is going to be. Join bases of tails with bases of the main string at the opposite sides of the loop and continue twisting the string creating the base of the loop and progressing until about two inches past the ends of the tails. Forming the base of the loop is shown on Picture 2. Now secure the end of twisted part of the string by using a bulldog clip or a bread twisty (found this on the net, a neat ides). Your first loop is done.

Step 3. Now get at the other end of the string. Twist each ply on its own about 40 times in the opposite direction from the twisting when making the string. Pull both ends to straighten and tighten the plies to make them ready for the second lop. Overlap the tails in opposite directions as shown on Picture 3. The middle of the lap is the middle of your second loop. Start twisting the second loop in both directions from the middle. This is shown on Picture 4. (The first loop that you have already done looked exactly the same at this stage, the only difference was the other end of the string was not joined.) Continue twisting until you reach a couple of inches (no mere) beyond the end of tails. Picture 5 shows the string with both loops finished.

Step 5. If you have given to both plies the right amount of twists in the opposite direction before joining the plies for the second loop you will now have a finished string with the body (between the twisted parts) consisting of two parallel and untwisted plies. Put one loop on the bow and twist the string in the direction the loops are twisted until you are happy with the amount of twist and the bracing height is right. Now whiz a piece of leather up and down the string to smooth the wax and serve the centre. The string is now completed.

The string made this way looks exactly the same as the conventional string (as you can see from the picture) but the loops are formed in a symmetrical way and not by bending the tail around the nock so that at one side of the nock it is only tail and at the other is only string. The way I described above you have half the tail and half the string at each side of the nock, therefore a symmetrical situation for the forces and friction within the string. The pressure of the nock on the loop increases the friction between the plies significantly and thus reduces the creep of the tail because in order to creep both sides will have to slide one against other through this high pressure point. This is not the case with the conventional string.

This way you can make a string of an even number of plies if you want to keep it completely symmetrical. Colourwise, you can easily conclude from the pictures and the description that, unless you are happy with mixed colours at the loops, you can have 1 colour per two plies. So to get a two colour string you need 4 plies, for 6 colour 3 plies etc. I will not be explaining how to do a 4 ply string because if you make a two ply you should be able to make 4 ply (or 6 ply) as well with no hassle.

Sorry ‘bout the pics I would also prefer them on some other kind of background.

Lou
Attachments
1.jpg
1.jpg (72.18 KiB) Viewed 4208 times

User avatar
Lou
Posts: 442
Joined: Sun Jul 11, 2004 1:00 am
Location: Melbourne, Australia

#39 Post by Lou » Fri Oct 01, 2004 11:25 pm

Flemish Pic 2
Attachments
2.jpg
2.jpg (79.07 KiB) Viewed 4208 times

User avatar
Lou
Posts: 442
Joined: Sun Jul 11, 2004 1:00 am
Location: Melbourne, Australia

#40 Post by Lou » Fri Oct 01, 2004 11:26 pm

Flemish Pic 3
Lou
Attachments
3.jpg
3.jpg (76.7 KiB) Viewed 4207 times

User avatar
Lou
Posts: 442
Joined: Sun Jul 11, 2004 1:00 am
Location: Melbourne, Australia

#41 Post by Lou » Fri Oct 01, 2004 11:27 pm

Flemish Pic 4
Lou
Attachments
4.jpg
4.jpg (74.92 KiB) Viewed 4206 times

User avatar
Lou
Posts: 442
Joined: Sun Jul 11, 2004 1:00 am
Location: Melbourne, Australia

#42 Post by Lou » Fri Oct 01, 2004 11:28 pm

Flemish Pic 5
Lou
Attachments
5.jpg
5.jpg (66.58 KiB) Viewed 4206 times

User avatar
erron
Posts: 3299
Joined: Wed Jul 23, 2003 10:33 am

#43 Post by erron » Sat Oct 02, 2004 10:00 am

Nice work Lou, another skill I'd like to pick up!

btw, do you know you can add all the pics in one post, by just selecting more Filenames in the Add an Attachment section?

Erron

User avatar
Lou
Posts: 442
Joined: Sun Jul 11, 2004 1:00 am
Location: Melbourne, Australia

#44 Post by Lou » Sat Oct 02, 2004 10:45 am

Thanks Erron, I was thinking of trying but was not sure how it was going to come up, as in what order the pictures were to be displayed. The way I did it I new what I was going to get.
If you don’t mind you can putt all the pictures in the same post and make it neater and I'll in the future, if need be, do as you suggested. :D

Its is very easy to do a Flemish string. You only need to see it done once or not even that. When I see you in Moorebin Archery Club I will show you if you want.

I pressed the enter button before adding the emoticons to my previous post, ooops :evil: ! The thing about the patent was with tang in cheek indeed.

Lou

User avatar
erron
Posts: 3299
Joined: Wed Jul 23, 2003 10:33 am

#45 Post by erron » Sun Oct 03, 2004 5:57 pm

No worries Lou, just thought I'd let you know. It is an annoying feature of the software that the pictures show in reverse order if included in the one post. So, you put them in the order you want reversed, if you get my drift: say you want tem to show 1 2 3, you post 3, then 2, then 1.

Yeah, Jeff showed me how to do a string, and Dennis, years ago, but I find if I don't do something as soon as i'm shown myself, that I forget how. Anyway I should have more time for things soon as we've sold the country place we had, which required a lot of weekend maintenance and running around. So no more excuses. This weekend I bought an old metal spokeshave to finish my bow with.

Things are gunna start to happen!

:P

Erron

User avatar
Lou
Posts: 442
Joined: Sun Jul 11, 2004 1:00 am
Location: Melbourne, Australia

#46 Post by Lou » Sun Oct 03, 2004 9:51 pm

Thanks Erron, good to know for the future the stuff about posting multiple pictures.

I know what you mean about the weekend maintenance, I am having the same trouble :x . Spent whole weekend digging the old lawn preparing to sow new grass hoping it was going to rain to start the germination. I ended up not sowing at all because it did not rain and the seeds would just get blown by the wind. That’s how you do it when we have the water restriction :lol: .

Anyway, I managed to prepare the linen, dyeing and waxing so it is all ready to be made into the string. The colours are just beautiful you’ll see when I post the picture. I ended up having tea, red and black. I also made a string jig as per an instruction on the net. The jig came up very nice and I made a dacron string for my bow to try the jig before committing to the linen. Good decision, the string came up 5 ½” shorter than what it should have. I recon the guy who did the jig web page got something mixed up. So, before doing the linen string I will have to recalculate and change the string length markings on the jig. Otherwise, the jig is very handy and only 30” long. Once the length markings are right, that’s going to be “da jig”. I’ll post the pic when linen string is finished.

:) Good luck with your bow, I hope we will see some pictures of the result. I presume it is a flatbow, what wood are you using?

Lou

User avatar
erron
Posts: 3299
Joined: Wed Jul 23, 2003 10:33 am

#47 Post by erron » Mon Oct 04, 2004 4:13 pm

Lou,

it's an English longbow style, actually. You can follow the progress so far on this thread:

http://www.ozbow.net/phpbb2/viewtopic.php?t=1407

cheers,

Erron

User avatar
Lou
Posts: 442
Joined: Sun Jul 11, 2004 1:00 am
Location: Melbourne, Australia

#48 Post by Lou » Mon Oct 04, 2004 10:37 pm

Norman and guys,

Hope you will like the string as I do :D .

It came up just as I wanted (I wish this happens more often). Here are some details:

To make this string I had to the following:

-Find the linen source (thanks Norman)
-Find onion skins for the red threads (thanks to the guy in the grocery shop)
-Buy black jeans dye
-Find out info about wax source and find the wax
-Make the string jig
-Dye the linen in three colours
-Wax the threads
-Make sure nothing goes wrong as I did not have another batch of the thread.

All things worked fine apart from the jig reading markings that are made for 8” loop overlaps and I prefer 10. The markings are on the short side even for the 8” loop overlaps and gets even worse as the string gets thicker :roll: . Luckily I did a dry run with Dacron.

I used Disney Busy Bee furniture shining beeswax and it turned up to be excellent for the job being emulsified in some solvent. You just get a pinch and apply to the thread by the fingers and it penetrates right through the threads. Half an hour latter it is dry and losses the solvent smell and becomes “pure” wax with just right stickiness for twisting, I’d say better than the factory applied stuff to Dacron B. Red onion skins gave nice dark red colour to the thread when boiled with them. The “soup” needs to be very strong. The (very strong) Indian tea gave nice beige colour to other thread. Both natural dyes are very persistent and no bleeding occurred due to the organic solvent when I was applying the wax with fingers.

The string ended up having 24 threads, 8 of each colour. As I originally measured the string Norman sent me and divided it in three equal parts they were just half a foot longer than what I needed for 8 threads.

Norman, you have done an excellent job when measuring the length of string to send me, just enough, no waste. I sent you a $45 cheque today and I am looking forward to a cone of linen.

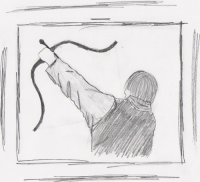
My all wood recurve finally got the string to match :D .

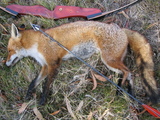
Here are some pics (all in one posting:wink: ):

Lou

User avatar
Lou
Posts: 442
Joined: Sun Jul 11, 2004 1:00 am
Location: Melbourne, Australia

#49 Post by Lou » Mon Oct 04, 2004 10:39 pm

:twisted: OK they did not come through probably due to me disabling applets or something, but here they are:
Lou
Attachments
jig.jpg
jig.jpg (29.41 KiB) Viewed 4274 times

User avatar
Lou
Posts: 442
Joined: Sun Jul 11, 2004 1:00 am
Location: Melbourne, Australia

#50 Post by Lou » Mon Oct 04, 2004 10:40 pm

Here is the string:
Lou
Attachments
String1.jpg
String1.jpg (117.13 KiB) Viewed 4272 times

User avatar
Lou
Posts: 442
Joined: Sun Jul 11, 2004 1:00 am
Location: Melbourne, Australia

#51 Post by Lou » Mon Oct 04, 2004 10:41 pm

And another shot :D :

Lou
Attachments
string2.jpg
string2.jpg (96 KiB) Viewed 4271 times

User avatar
yeoman
Posts: 1563
Joined: Mon Mar 08, 2004 1:32 pm
Location: Canberra

#52 Post by yeoman » Mon Oct 04, 2004 10:47 pm

Nice. The string goes very well with the bow. The colors are almost reminiscent of a coral snake.

Now you need some horn/reinforced wood/self nocks on your arrows with bird feathers!

Yeoman
https://www.instagram.com/armworks_australia/

Bow making courses, knife making courses, armour making courses and more:
http://www.tharwavalleyforge.com/

Articles to start making bows:
http://www.tharwavalleyforge.com/index. ... /tutorials

User avatar
Lou
Posts: 442
Joined: Sun Jul 11, 2004 1:00 am
Location: Melbourne, Australia

#53 Post by Lou » Mon Oct 04, 2004 11:09 pm

Erron,

English style longbows are difficult to make if you don’t have the right wood, that would be yew or osage but also some other woods with the ability to strain (stretch or compress) about three times than say maple and without getting permanent set or breaking. This is because of the relatively low thickness to length ratio of this style of design. Whether the wood is suitable for longbow design as well as for other designs can be easily established by a simple home done test. The test results and a little of ‘rithmetic would allow you to make the most efficient bow out of a piece of wood without the risk of breaking the bow or getting excessive string follow. The method may not sound traditional but the bow will look traditional if made so :) .

What you have done so far looks very nice. Good luck!

Lou

User avatar
Lou
Posts: 442
Joined: Sun Jul 11, 2004 1:00 am
Location: Melbourne, Australia

#54 Post by Lou » Mon Oct 04, 2004 11:13 pm

Gee Yeoman, you are giving me hard tasks :lol: !

It will happen, but I am in th eproces of making the split tonkin cane shafts at the moment.

Lou

User avatar
Hood
Posts: 1562
Joined: Mon Aug 16, 2004 11:39 pm
Location: Adelaide, South Australia

#55 Post by Hood » Mon Oct 04, 2004 11:22 pm

Lou

thats a very nice looking string and bow. great job mate.

Mick
Bow Hunting is my Passion.

My wife says it's my Obsession.

Either way I'm happy.

User avatar
Lou
Posts: 442
Joined: Sun Jul 11, 2004 1:00 am
Location: Melbourne, Australia

#56 Post by Lou » Mon Oct 04, 2004 11:29 pm

Thanks Mick :D !
Lou

User avatar
erron
Posts: 3299
Joined: Wed Jul 23, 2003 10:33 am

#57 Post by erron » Tue Oct 05, 2004 6:26 pm

Absolutely yes, beautiful bow, beautiful string, great match as Dave said!

:)

Here's a shot of the String Jig I bought off Jeff Challacombe when he was making them. Check out the (is it fiddleback) wood :!: :shock: It's so pretty I almost 'aint had the heart to use it!!!

:lol:

Erron
Attachments
String-Jig-002.jpg
String-Jig-002.jpg (40.26 KiB) Viewed 4226 times

User avatar
Lou
Posts: 442
Joined: Sun Jul 11, 2004 1:00 am
Location: Melbourne, Australia

#58 Post by Lou » Tue Oct 05, 2004 7:15 pm

Erron, the jig is bbeeaauuttiiffuull :o ! I think it's Oz lacewood, Jeff can correcte me if I am wrong. Now you've got no excuse not to make a string or two :lol: :lol: !
Lou

User avatar
gilnockie
Posts: 603
Joined: Wed Sep 24, 2003 7:34 pm
Location: Hobart Tas

#59 Post by gilnockie » Tue Oct 05, 2004 8:21 pm

Congratulations Lou, an excellent job.
Norman

Draw, anchor, loose.

User avatar
gilnockie
Posts: 603
Joined: Wed Sep 24, 2003 7:34 pm
Location: Hobart Tas

#60 Post by gilnockie » Tue Oct 05, 2004 8:22 pm

Congratulations Lou, an excellent job.
Norman

Draw, anchor, loose.

Post Reply